If you’re anything like me, your dog isn’t just a pet—they’re your little shadow, your cozy-night-in buddy, and the reason your camera roll is 97% furry close-ups.
And because our pups bring so much joy into our lives, it feels natural to want to create things just for them—things that make their days a little comfier, a little happier, and a lot more fun.
That’s exactly what this guide is all about.
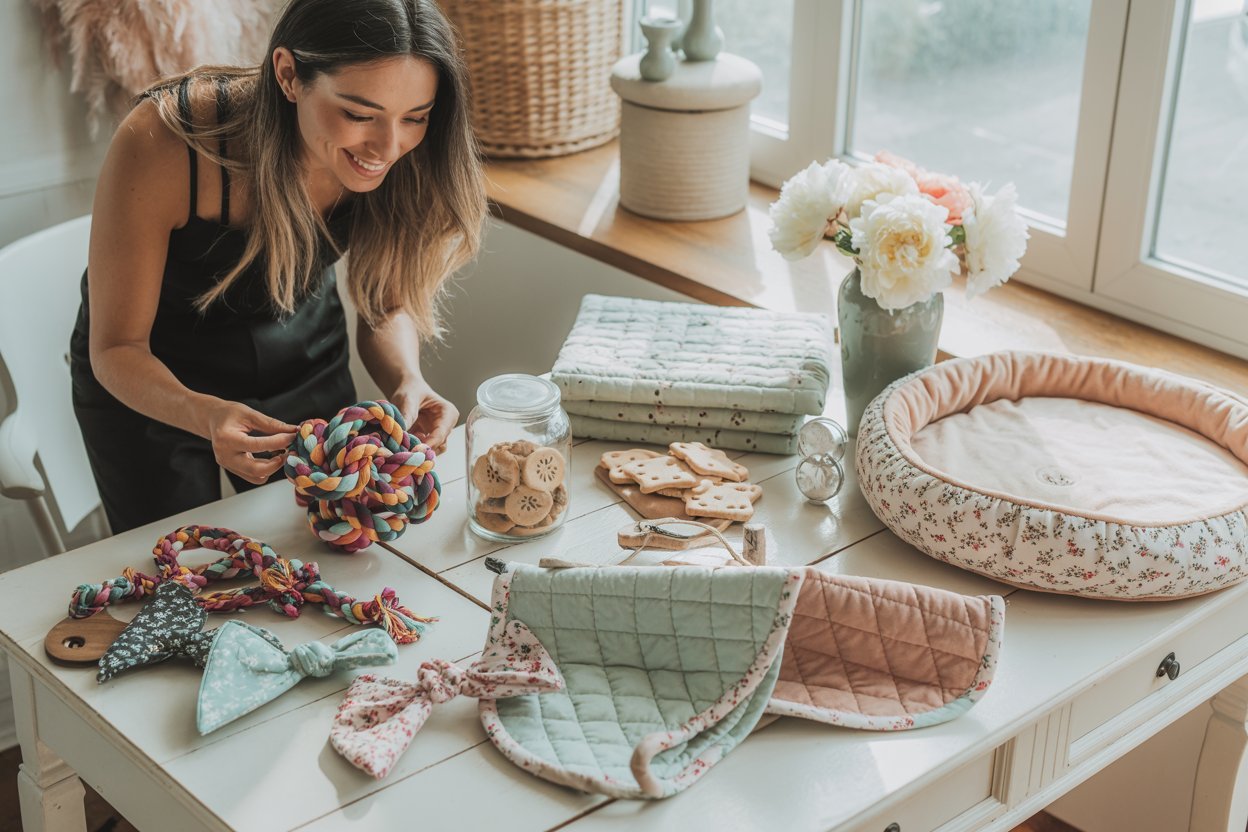
These 10 DIY projects for dog lovers are designed with heart, practicality, and plenty of tail-wagging goodness.
Whether you’re a crafty queen, a weekend maker, or someone who just loves spoiling their pup with handmade touches, you’ll find something here that’s budget-friendly, beginner-friendly, and absolutely dog-approved.
From chic home décor your pup can enjoy to treats and toys you can whip up in an afternoon, each project is meant to help you create a home that feels warm, intentional, and full of love—for both you and your dog.
So grab your glue gun, your softest fabrics, and maybe a handful of treats to keep your furry helper entertained.
Let’s get creative and make something beautiful for the four-legged friend who makes every day sweeter.
10 DIY Projects for Dog Lovers
- Cozy No-Sew Dog Blanket
- Braided T-Shirt Rope Toy
- Decorative Dog Treat Jar
- Personalized Dog Leash Holder
- Pet Portrait Wall Art
- Homemade Dog Treats
- No-Sew Dog Bed
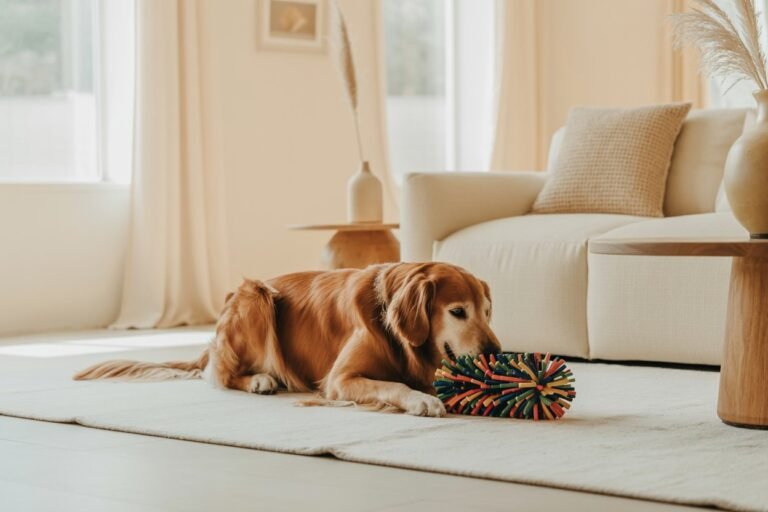
- DIY Dog Enrichment Wall
- Custom Dog Bandanas
- Memory Box for Your Dog
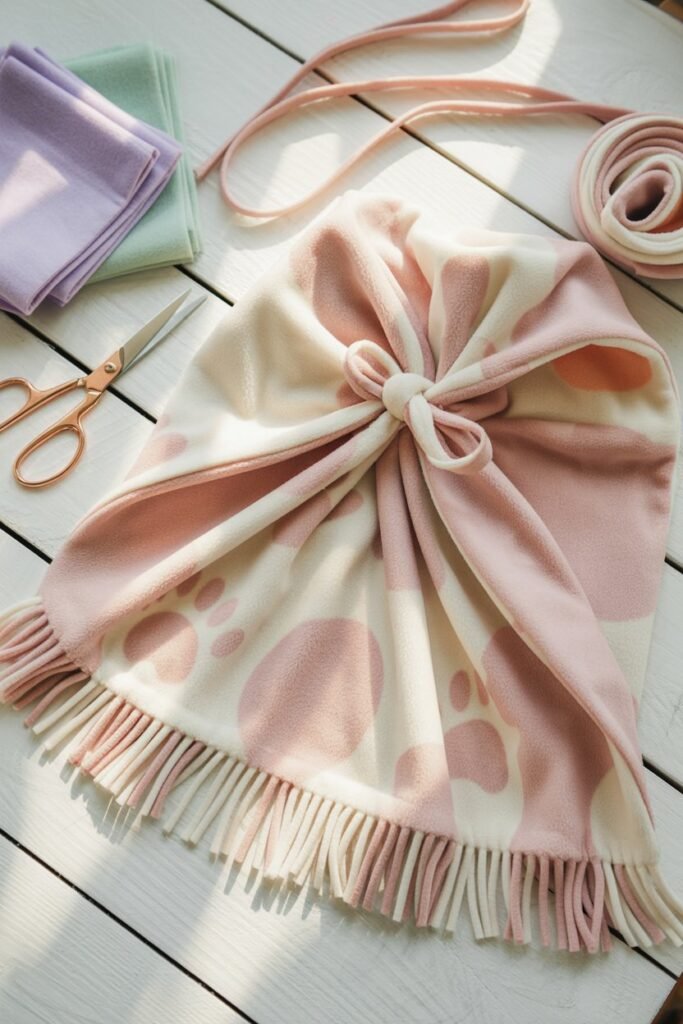
1: Cozy No-Sew Dog Blanket
SEO Keywords: DIY dog blanket, no-sew dog blanket, homemade dog bedding, DIY pet comfort items, dog blanket tutorial
If you’ve ever watched your dog circle their bed three times before flopping down with a big satisfied sigh, you already know something important: comfort matters to dogs just as much as it does to us.
And while store-bought blankets are fine, there’s something unbelievably sweet about making a blanket just for your pup. It’s personal, it’s soft, it’s meaningful — and it’s way easier than you think.
A no-sew blanket is perfect for dog lovers who want to create something cozy without pulling out a sewing machine.
Plus, you can choose colors and patterns that match your home, your dog’s personality, or even the season. Think blush pinks, warm neutrals, soft sage greens, checkered taupes, tiny paw prints whatever feels “you.”
Why This Project Is Necessary
Dogs thrive when they have a dedicated comfort object: a blanket that smells like home and makes them feel safe. Whether it’s for bedtime, car rides, crate naps, or curling up beside you on the couch, a soft blanket can:
- Reduce anxiety during loud noises or travel
- Give your dog a sense of ownership
- Add warmth for puppies or senior dogs
- Protect your furniture from fur and dirt
- Create a designated calm zone anywhere in your home
Plus, for multi-dog homes, having individual blankets helps cut down on territorial squabbles and gives every pup their own cozy spot.
How to Make It (Beginner-Friendly!)
Materials:
- 2 pieces of fleece fabric (1–2 yards depending on dog size)
- Scissors
- A flat workspace
- Optional: a ruler or rotary cutter
Steps:
- Lay the two fleece pieces on top of each other, making sure they are the same size.
- Smooth the fabric so the edges align. Trim if necessary.
- Cut a 4-inch square from each corner.
- Cut 1-inch wide strips all around the edges, about 4 inches deep.
- Tie the top and bottom strips together tightly all around the blanket.
- Shake it out, fold it, and gift it to your pup with a treat on top.
Extra Tips & Personal Touches
- Choose anti-pill fleece so the blanket stays plush after washing.
- Add a matching tassel or bow for a feminine vibe.
- Make a smaller travel-sized version for car rides.
- Spray lightly with a lavender dog-safe calming mist for nighttime comfort.
Your pup will instantly know this blanket was made just for them — and honestly, watching them curl into something you crafted with love is the best part.
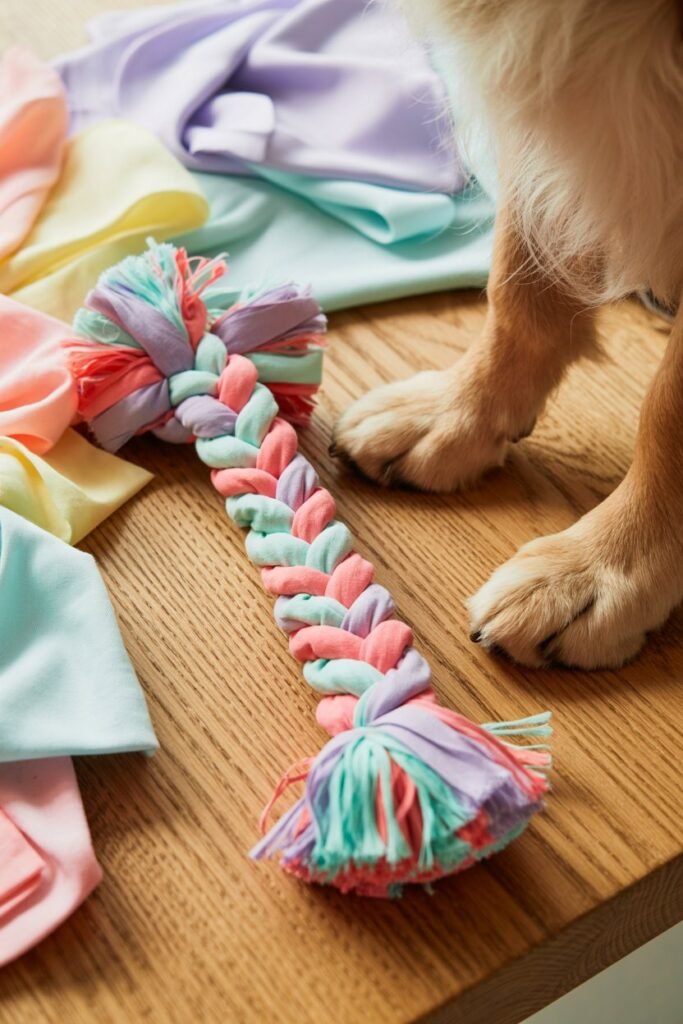
2: Braided T-Shirt Rope Toy (Eco-Friendly Dog Toy)
SEO Keywords: DIY dog toy, homemade dog rope toy, no-sew dog toy, eco-friendly dog project, upcycled dog toy
If you’ve ever walked into the living room and found a shoe mysteriously chewed, a pillow corner “taste-tested,” or a random sock dragged under the couch, then you already know how important it is for dogs to have safe, satisfying chew toys.
This DIY braided T-shirt rope toy is the perfect solution — gentle on your dog’s teeth, durable enough for tug-of-war, and made entirely from materials you already have at home.
Plus, it’s eco-friendly, which always feels good. Instead of throwing out old shirts, you’re turning them into something fun and functional for your dog. It’s soft, washable, and completely customizable depending on your dog’s size and chewing style.
Why This Project Is Necessary
Chewing isn’t just a “bad habit” — it’s a natural behavior that keeps dogs mentally stimulated, relieves stress, and helps clean their teeth. This toy offers:
- Safe chewing to protect your belongings
- Mental stimulation during boredom
- Bonding opportunities during tug play
- Redirection for puppies and teething dogs
- Eco-friendly crafting that reduces waste
For multi-dog homes, rope toys are essential because they encourage cooperative play (and prevent the “my toy” drama). And since you can make multiple in minutes, each pup can have their own.
How to Make It (Simple, No-Sew, Beginner-Friendly)
Materials:
- 2–3 cotton T-shirts (clean, worn-out shirts are ideal)
- Scissors
- Optional: A safety pin to hold ends in place while braiding
Steps:
- Lay the shirts flat and cut off the bottom hem.
- Cut the rest of the shirt into long strips about 1–2 inches wide.
- Gather the strips into three bundles.
- Tie a large, tight knot at one end (double-knot for power chewers).
- Braid the strips tightly all the way down.
- Tie a matching knot at the end.
- Trim any loose edges so it’s neat and safe.
Extra Tips to Personalize It
- Use pastel shirts for a soft, feminine color palette.
- Create a double-braid for large dogs.
- Add a few drops of dog-safe flavor spray (like bacon or peanut butter) to make it extra appealing.
- Toss it in the wash with your dog’s bedding to keep it fresh.
- Make mini versions for puppies or senior dogs with sensitive teeth.
This DIY rope toy is not only adorable and durable, but it also carries your scent — and to your dog, that makes it extra special. There’s something sweet about knowing your pup is playing with something handmade just for them.
3: Decorative Dog Treat Jar (Pretty + Functional Countertop Storage)
SEO Keywords: DIY dog treat jar, dog treat storage ideas, aesthetic pet treat jar, homemade dog treat container, kitchen organization for dog owners
If you’re a dog mom who loves a tidy, beautifully styled kitchen, then you probably understand the frustration of those crinkly plastic treat bags cluttering up your counters or cabinets.
They’re messy, noisy, and honestly… not cute. That’s why creating your own decorative dog treat jar is such a game-changer. It turns everyday treats into a piece of décor — feminine, functional, and perfectly matched to your home aesthetic.
A treat jar also makes training moments so much easier. Instead of rummaging through drawers or trying to rip open a bag with one hand while holding your dog’s attention with the other, you can simply reach for your stylish jar and reward your pup instantly.
Why This Project Is Necessary
Besides keeping your home organized and visually appealing, a dog treat jar offers a surprising amount of value:
- Keeps treats fresh longer with a tight seal
- Makes training more efficient with quick access
- Reduces clutter and eliminates crinkly treat bags
- Adds a feminine, personalized touch to your kitchen, pantry, or entryway
- Helps you monitor treat portioning so you don’t accidentally overfeed
- Perfect for multi-dog homes (you can make one jar per dog!)
If you’re into home décor, this project is a dreamy mix of creativity and practicality.
How to Make It (Chic & Easy)
Materials:
- A mason jar or airtight glass jar
- Acrylic paint (blush, cream, latte brown, or soft pastel)
- Small paintbrush
- Vinyl letters or label stickers
- Optional: a satin ribbon or charm for the lid
Steps:
- Choose a jar that fits the amount of treats you use weekly (freshness is key).
- Paint the lid with your chosen color. Allow it to fully dry.
- Apply vinyl lettering or a label that says “Treats,” your dog’s name, or a cute phrase like good girl snacks.
- Add a ribbon, charm, or tiny paw decal for extra personality.
- Fill with your dog’s favorite treats and display proudly on your counter or coffee nook.
Extra Tips for That Feminine Aesthetic
- Match the jar color to your kitchen tones (think soft whites, rose gold, taupe).
- Use a matte finish for a modern, minimalist vibe.
- If you have two dogs, create a matching set with their names.
- Add a chalkboard label if you rotate treat types.
- Choose a clear jar so you can easily see when you’re running low.
This little project elevates your entire space while keeping your dog’s goodies fresh and accessible — and it’s one of those simple touches that genuinely improves your daily routine.
4: Personalized Dog Leash Holder (Pretty, Practical Entryway Organization)
SEO Keywords: DIY dog leash holder, personalized leash hanger, dog walking organization, pet entryway décor, dog leash storage ideas
Every dog mom knows the struggle of juggling leashes, harnesses, poop bags, keys, and everything else that magically disappears right when you’re ready for a walk.
And let’s be honest — nobody wants to play scavenger hunt every time their dog hears the word “walk.” That’s why a personalized dog leash holder is such a lifesaver.
It keeps everything organized in one stylish spot and adds a warm, dog-loving touch to your entryway or mudroom.
This project combines beauty and function effortlessly. Instead of a messy basket or hooks that can’t handle the weight of your dog gear, you’ll have a sturdy, personalized piece that keeps your home tidy and your walks stress-free.
Why This Project Is Necessary
Creating a designated leash station means more than just organization — it improves your daily routine. Here’s why this DIY is worth doing:
- Eliminates clutter in your entryway
- Saves time by keeping all walk essentials in one spot
- Reduces stress for your dog (they sense your energy before walks)
- Adds charm and personality to your décor
- Perfect for multi-dog households to separate each dog’s gear
- Makes last-minute potty breaks easier
- Keeps leashes clean and off the floor
It’s one of those projects you’ll finish and immediately wonder why you didn’t do it sooner.
How to Make It (Beginner-Friendly, No Power Tools Needed)
Materials:
- Wooden plaque or pre-cut wood sign
- Paint or stain (white, blush, sage, taupe, oak — feminine-friendly options)
- Decorative hooks or knobs
- Vinyl lettering or stencils
- Strong command strips or mounting hardware
- Optional: satin ribbon, floral decals, or paw-print stencils
Steps:
- Start by painting or staining your wood plaque in your chosen color. Allow to dry.
- Decide on your layout — name at the top, hooks at the bottom. Lightly mark with pencil.
- Add vinyl lettering, such as your dog’s name, “Walkies,” or “Let’s Go Outside.”
- Screw or glue on your decorative hooks (ceramic knobs look especially feminine).
- Add embellishments like tiny bone decals, floral corners, or a satin bow.
- Mount securely near your entryway door.
- Hang leashes, harnesses, potty bag holders, and your grab-and-go walking essentials.
Extra Tips for That Feminine Touch
- Use antique brass or rose-gold hooks for an elevated look.
- Choose soft pastel paint shades to match a modern girly home aesthetic.
- Create one hook per dog if you have multiple pups.
- Add a small shelf above for treats, keys, or a framed photo of your dog.
- Use a matte chalkboard strip for writing reminders (“Refill poop bags!”).
A personalized leash holder doesn’t just organize your space — it makes walking your dog feel smoother, prettier, and more intentional. It’s the perfect blend of style and practicality for any dog-loving home.
5: Pet Portrait Wall Art (Chic, Sentimental, & Totally Dog-Mom Approved)

SEO Keywords: DIY pet portrait, dog wall art DIY, custom pet artwork, aesthetic dog wall décor, homemade dog portrait
There’s something so special about turning your home into a space that reflects the things you love most — and if you’re a dog mom, that definitely includes your furry best friend.
Creating your own pet portrait wall art is one of the most heartfelt DIY projects you can do. It’s stylish, meaningful, and surprisingly easy, even if you’re not artistic. Plus, it adds a feminine, soft, personal touch to any gallery wall, hallway, or cozy corner of your home.
You’re not just putting up a picture — you’re celebrating your dog’s personality, sweetness, quirks, and the joy they bring into your life every day. This project becomes a keepsake, something you’ll cherish forever.
Why This Project Is Necessary
A DIY pet portrait carries emotional value that goes far beyond décor. It:
- Turns a memory into art
- Personalizes your home with intention
- Creates a unique, stunning focal point
- Makes guests instantly smile when they see it
- Preserves your dog’s personality in a creative way
- Perfect for multi-dog homes (build a whole gallery!)
And because it’s handmade, it feels warm, meaningful, and full of heart — exactly what a dog mom’s home should feel like.
How to Make It (Beginner-Friendly, Artistic or Not!)
Materials:
- A high-resolution photo of your dog
- A blank canvas (8×10, 11×14, or any size)
- Mod Podge (matte finish looks soft and feminine)
- A foam or soft-bristle brush
- Acrylic paints (optional for embellishments)
- Optional: gold leaf, floral decals, or metallic markers for accents
Steps:
- Print a clear photo of your dog on regular or photo paper.
- Apply a thin, even layer of Mod Podge to the canvas.
- Gently place the photo onto the canvas, smoothing out air bubbles.
- Apply another thin layer of Mod Podge over the photo, brushing in one direction for a soft finish.
- Let dry completely.
- Add optional artistic touches:
- Light brushstroke borders for a dreamy effect
- Gold leaf around the edges
- Small hand-painted hearts or paw prints
- Soft floral accents to match your home aesthetic
- Hang on your wall and pair with other frames for a curated look.
Extra Tips for the Perfect Feminine Aesthetic
- Choose light, airy photos with natural lighting.
- Use soft pinks, golds, creams, and neutrals for accents.
- Add your dog’s name in elegant script beneath the portrait.
- Frame the canvas with a thin gold or white frame for a chic finish.
- Create a mini dog-themed gallery wall with multiple poses.
This project is the perfect blend of sentimental and stylish — a beautiful reminder of the furry soul who fills your home with love. Every time you walk past your handmade portrait, you’ll feel that little spark of dog mom joy.
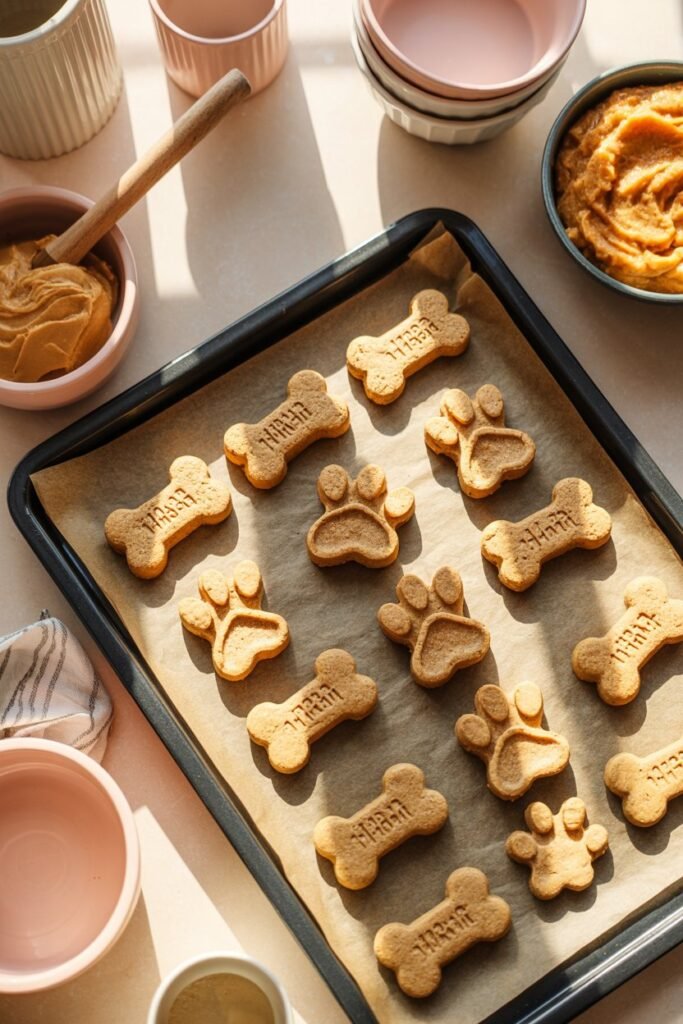
6: Homemade Dog Treats (Healthy, Simple & Tail-Wagging Good)
SEO Keywords: homemade dog treats, DIY dog treat recipe, healthy dog treats, easy dog biscuits, natural dog snacks
There’s something incredibly satisfying about making homemade treats for your dog.
Not only does your kitchen instantly smell cozy and delicious, but you also get complete control over what goes into your pup’s snacks.
No fillers, no preservatives, no mystery ingredients — just wholesome, natural goodness you can feel proud giving to your furry best friend.
This DIY project is ideal for dog moms who love baking, enjoy spoiling their pups, or want a healthier alternative to store-bought treats. Plus, homemade treats make adorable gifts for dog birthdays, holidays, or playdates with other pups.
Why This Project Is Necessary
Store-bought treats can be convenient, but they often come with:
- unnecessary preservatives
- artificial flavors
- added sugars
- ingredients your dog may be sensitive to
Homemade treats give you total freedom to choose nourishing, dog-safe ingredients — and that alone makes this project worth it. But beyond health benefits, homemade treats also:
- strengthen the bond between you and your dog
- are perfect for training sessions
- save money in the long run
- allow you to customize flavors your dog loves
- offer peace of mind for pups with allergies or sensitivities
Whether your pup loves peanut butter, pumpkin, banana, or sweet potato, you can tailor every batch to their taste.
How to Make Them (Simple, Healthy & Delicious)
Ingredients (basic recipe):
- 1 cup oat flour (or blended rolled oats)
- ½ cup pumpkin purée or mashed banana
- ¼ cup natural peanut butter (xylitol-free)
- Optional: 1 egg for a firmer biscuit texture
Steps:
- Preheat your oven to 350°F (175°C).
- Mix all ingredients together in a bowl until a dough forms.
- Dust your surface with oat flour and roll the dough out.
- Use cute cookie cutters — hearts, stars, paw prints, bones — for a feminine touch.
- Place treats on a parchment-lined baking sheet.
- Bake for 12–18 minutes, depending on thickness.
- Cool completely before serving or storing in an airtight jar.
Extra Tips for Personalizing Your Treats
- Add a tablespoon of flaxseed for extra nutrition.
- Use silicone molds to create adorable shapes.
- Make “mini treats” for training rewards.
- Store in the fridge for up to a week, or freeze for 3 months.
- Create seasonal versions — pumpkin, cranberry, apple cinnamon (dog-safe!), etc.
Making homemade dog treats isn’t just about food — it’s an act of love. Watching your pup’s tail wag as they sit eagerly waiting for a warm, freshly baked treat is one of those small, precious joys that makes being a dog parent so special
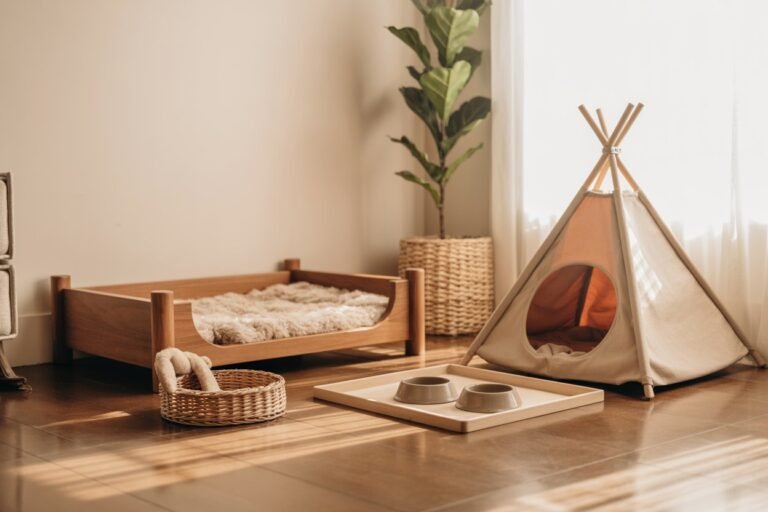
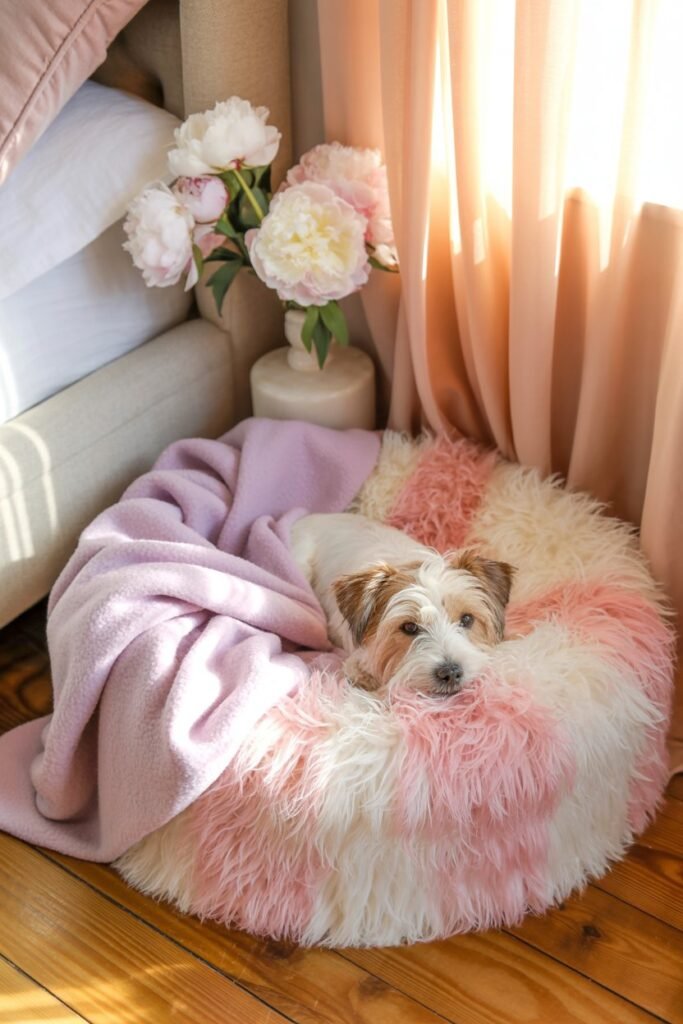
7: No-Sew Dog Bed (Soft, Stylish & Perfect for Any Room)
SEO Keywords: DIY dog bed, no-sew dog bed, homemade pet bed, easy dog bedding, dog room ideas
Every dog deserves a cozy little corner to call their own — a soft, warm place where they can curl up, nap, dream, and keep an eye on their favorite human (yes, that’s you).
A no-sew dog bed is one of the most rewarding DIY projects because it’s beautiful, practical, budget-friendly, and totally customizable to your home’s aesthetic.
Even better? You don’t need sewing skills or fancy tools. With just a few simple materials, you can create a plush, feminine-friendly bed that gives your dog a comfortable retreat while adding a stylish touch to your space.
Why This Project Is Necessary
A dedicated dog bed isn’t just décor — it supports your pup’s comfort, well-being, and daily routine. A DIY dog bed can:
- Provide essential joint support for dogs of all ages
- Reduce anxiety by giving your dog a designated safe space
- Keep your furniture cleaner by giving your pup an alternative lounging spot
- Match your home aesthetic better than most store-bought beds
- Fit perfectly into odd-shaped corners or small spaces
- Allow personalization for multi-dog homes (one bed per pup!)
Plus, making it yourself means you can choose hypoallergenic, washable, dog-safe materials — something store-bought beds often fail at.
How to Make It (Cute, Cozy & Beginner-Friendly)
Materials:
- Two pieces of fleece fabric (larger than your dog’s sleeping size)
- Fabric scissors
- Polyester fiberfill or an old pillow
- Optional: stencils or fabric markers for personalization
Steps:
- Lay both pieces of fleece together, wrong sides facing out.
- Cut a 4–5 inch square out of each corner.
- Cut 1-inch wide strips around all sides, about 4–5 inches long.
- Tie strips together — one top strip to one bottom strip — around three sides.
- Stuff the bed with fiberfill or the inside of an old pillow until it’s fluffy.
- Tie the remaining side closed.
- Fluff, shape, and place it in your dog’s favorite cozy spot.
Extra Tips for That Feminine, Aesthetic Look
- Choose calming, soft colors like blush, beige, sage, or cream.
- Use printed fleece like tiny florals, hearts, or subtle patterns.
- Add your dog’s name with fabric paint for personalization.
- Create two beds: one for the living room, one for your bedroom.
- Pair the bed with a matching blanket for a full cozy set.
Your dog will instantly sense it’s theirs — and nothing beats watching them curl into something handmade with love. This no-sew bed brings comfort, beauty, and warmth into your dog’s life and your home.
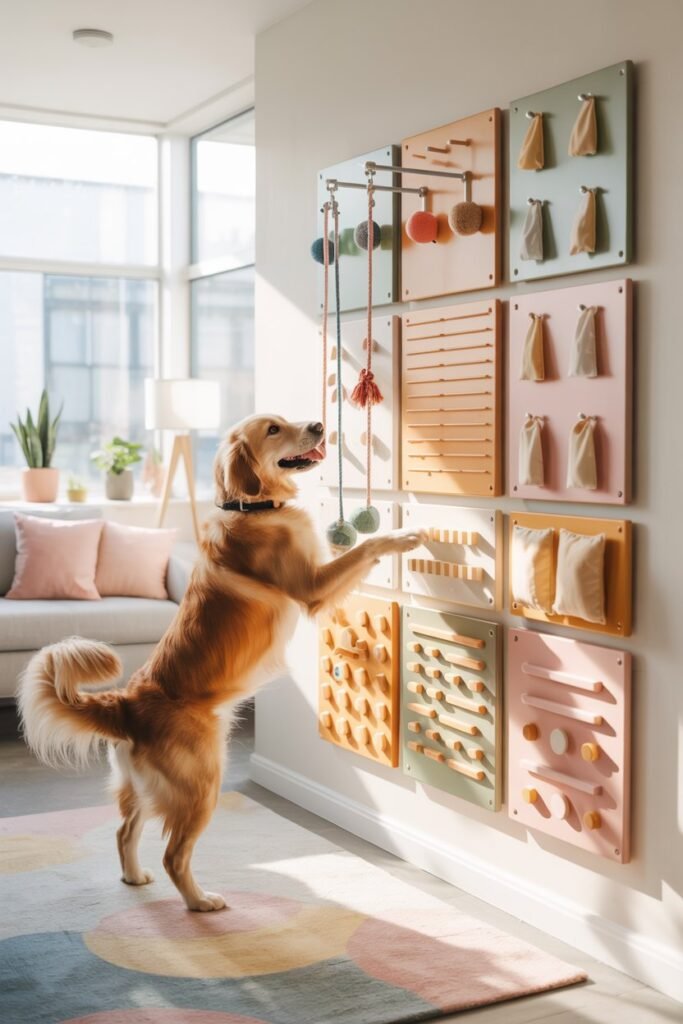
8. DIY Dog Enrichment Wall (Sensory Activity Board for Dogs)
SEO Keywords: dog enrichment wall, DIY sensory board for dogs, dog mental stimulation ideas, indoor dog activities, enrichment ideas for multi-dog homes
A DIY Dog Enrichment Wall is one of the smartest upgrades you can add to your multi-dog home—especially if you’re dealing with high-energy breeds, rainy-day boredom, or dogs who constantly need mental stimulation.
Unlike puzzle toys that end up scattered around the house, an enrichment wall stays neatly in one area and keeps all your dogs engaged at once. It’s low-cost, customizable, renter-friendly, and a perfect solution for pet parents who want to boost enrichment without clutter.
An enrichment wall works because it taps into your dog’s natural instincts—sniffing, foraging, problem-solving, touching different textures, and working for rewards.
How to Build Your DIY Dog Enrichment Wall
Start with a pegboard or slat wall. Pegboards are affordable, lightweight, and easy to hang, while slat walls offer more design flexibility. Choose a wall section that your dogs can safely access—preferably in a low-traffic area where they won’t get overexcited by people walking by.
Next, gather sensory and enrichment elements such as:
- Silicone lick mats
- Treat pouches or small canvas bags
- Rope pulls
- Textured panels (faux grass, rubber mats, crinkle fabric)
- Snuffle pockets
- Hanging food toys (Kongs, slow feeders, PVC tubes with holes)
- Bells or soft noise elements
Arrange the items at different heights to match the sizes of your dogs. Secure everything tightly so curious pups can’t rip pieces off. You can rotate toys weekly to keep things exciting—this boosts engagement and prevents boredom.
For added fun, create “challenge zones” like a treat-dispensing corner, a sniffing area, and a texture exploration section. The more variety you offer, the better the mental workout.
A DIY Dog Enrichment Wall not only enhances your home but also creates a stimulating, calming environment that keeps your dogs busy, entertained, and mentally fulfilled. It’s beautiful, functional, and a total pet-parent win.
9: Custom Dog Bandanas (Adorable, Personal & Photo-Ready)
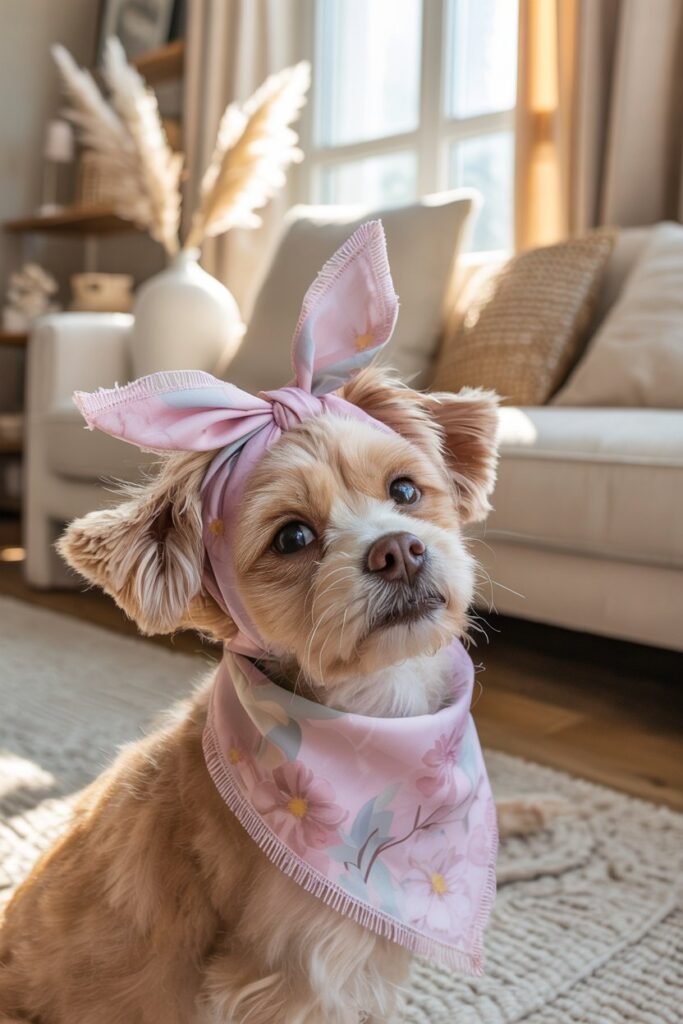
SEO Keywords: DIY dog bandanas, homemade dog accessories, custom dog scarf, dog fashion DIY, dog wardrobe ideas
Every dog mom knows that a cute bandana can instantly turn an ordinary walk into a stylish mini photoshoot.
Whether it’s a special occasion, a daily stroll, or a playful photo moment, DIY dog bandanas are the perfect way to add personality, color, and charm to your pup’s wardrobe.
The best part? They’re inexpensive, easy to make, and fully customizable to match your home aesthetic, your style, or your dog’s personality.
Bandanas also serve a practical purpose: they help catch drool, add a little warmth for small dogs in cooler months, and are perfect for layering with collars or sweaters.
Creating your own allows you to choose safe fabrics, non-toxic dyes, and patterns that suit your pup’s personality — no more settling for store-bought designs that don’t quite feel right.
Why This Project Is Necessary
Dog bandanas are more than just cute accessories — they:
- Showcase your dog’s personality and style
- Help create memorable photo moments
- Make great gifts for friends or doggy playdates
- Offer a sense of identity for your pup in multi-dog households
- Encourage socialization when neighbors and friends notice the cute accessory
It’s a fun, simple project that transforms everyday walks into little celebrations.
How to Make Them (Simple & Stylish)
Materials:
- 100% cotton or soft fabric
- Fabric scissors
- Sewing machine or fabric glue (no-sew option)
- Optional: fabric markers, ribbons, or appliqués
Steps:
- Cut a triangle of fabric that’s large enough to fit comfortably around your dog’s neck.
- Fold over the top edge about ½ inch and secure with fabric glue or stitch for a clean finish.
- Add optional embellishments like bows, fabric paints, or your dog’s initials.
- Slip the bandana over your dog’s collar or tie loosely around the neck (ensuring it’s safe and not tight).
- Let your pup strut their stuff!
Extra Tips for Feminine Flair
- Use pastel florals, soft pinks, or polka-dot fabrics for a chic look.
- Make holiday-themed bandanas for seasonal photos.
- Layer with a matching leash or collar for coordinated style.
- For puppies or small dogs, make mini versions to avoid overwhelming them.
- Wash fabric before use to remove any chemicals and keep it soft.
A custom dog bandana is a small, handmade touch that instantly brings style, joy, and personality into your dog’s everyday life. Plus, it doubles as a great conversation starter wherever you go!
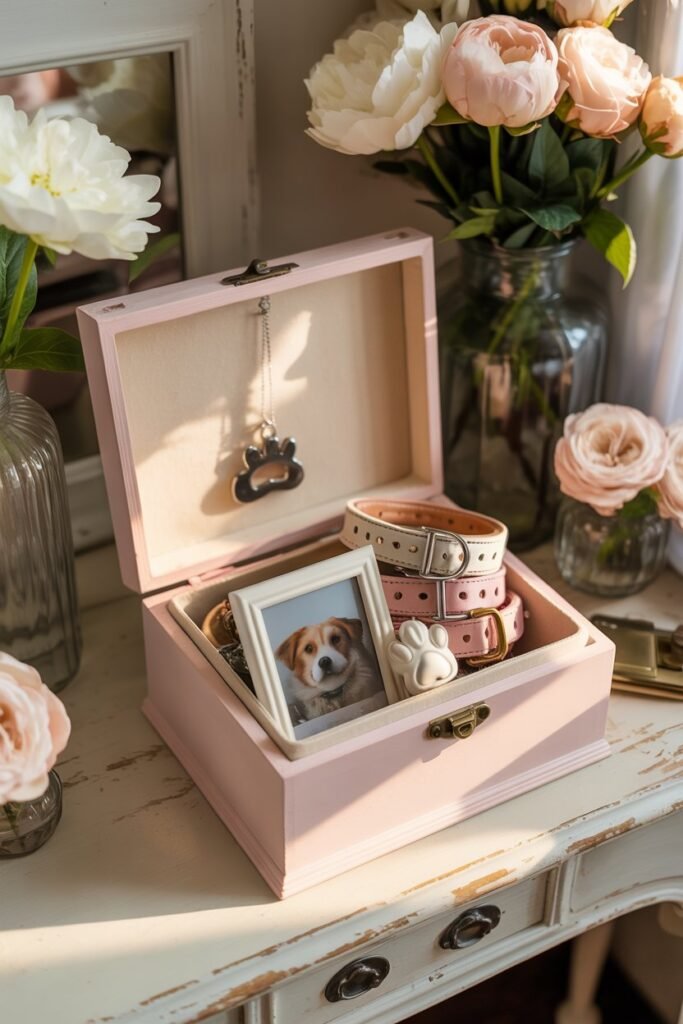
10: Memory Box for Your Dog (Sentimental Keepsake for Dog Moms)
SEO Keywords: DIY dog memory box, dog keepsake box, sentimental dog gift, personalized dog memory project, dog mom DIY
Dogs may only be with us for a fraction of our lives, but the memories they leave behind are forever.
A DIY memory box for your dog is the perfect project to preserve all those little treasures that make your pup’s life—and your life together—so special.
From first collars and tags to photos, vet records, and even a tuft of fur, a memory box keeps everything safe, sentimental, and beautifully organized.
Creating a memory box isn’t just practical — it’s a heartfelt way to celebrate the bond you share with your furry best friend.
It’s also a wonderful gift for dog-loving friends, a creative keepsake for milestones like birthdays or “gotcha” days, or a way to remember a dog who has crossed the rainbow bridge.
Why This Project Is Necessary
A memory box offers both emotional and practical benefits:
- Keeps treasured items organized and protected
- Provides a special space for sentimental memories
- Creates a lasting keepsake that grows over your dog’s life
- Makes a meaningful, handmade gift for other dog moms
- Allows you to reflect on milestones, achievements, and precious moments
For multi-dog households, a memory box for each dog ensures every furry family member has their own personal archive, keeping their memories distinct and celebrated.
How to Make It (Easy & Sentimental DIY)
Materials:
- A wooden or sturdy cardboard box with a lid
- Fabric or scrapbook paper to line the interior
- Paints, markers, or vinyl stickers for personalization
- Optional: small envelopes, photo corners, or dividers
Steps:
- Choose a box large enough to hold your keepsakes.
- Paint or decorate the exterior in your preferred feminine colors (soft pink, cream, pastel blue, or gold accents).
- Line the inside with soft fabric or patterned paper.
- Personalize with your dog’s name, a paw print, or a meaningful quote.
- Begin filling it with mementos: photos, tags, favorite collars, special toys, vet cards, and small notes about milestones.
- Keep adding over time — this box grows with your dog.
Extra Tips for a Charming Memory Box
- Use small pouches for tiny items like first teeth or hair locks.
- Create a “birthday section” for annual photos or party memorabilia.
- Add a mini scrapbook page for each major milestone.
- Keep the box in a safe, easily accessible place so you can add memories regularly.
A DIY memory box is more than storage — it’s a tangible symbol of love, care, and the beautiful moments you share with your dog. Every time you open it, you’ll be reminded of the unconditional love and joy your pup brings to your life.
Conclusion
Being a dog mom isn’t just about cuddles, walks, and treats—it’s about creating a life full of love, joy, and meaningful moments with your furry best friend.
These 10 DIY projects for dog lovers aren’t just fun crafts; they’re ways to make your home more comfortable, your dog’s life more enriching, and your bond even stronger.
From cozy no-sew blankets to personalized leash holders, homemade treats, and even memory boxes, each project is a small, heartfelt way to celebrate the little things that make your dog so special.
The best part? They’re easy, budget-friendly, and customizable to match your personal style while keeping your pup happy, safe, and loved.
So grab your fabrics, paints, and treats, and start creating. Your dog will notice the love in every stitch, every snack, and every thoughtful touch—and you’ll enjoy the satisfaction of knowing these handmade projects made their life a little brighter.