If you’ve ever looked at your dog’s homemade treats and thought, “These would look so cute with icing!” you’re not alone.
I used to feel the same way. I’d scroll through Pinterest, see all those gorgeous frosted dog biscuits, and wish I knew how to make icing that was safe, simple, and actually looked good.
After a lot of testing (and a few sticky kitchen counters later), I finally found the perfect easy dog icing recipe.
It’s made with wholesome, dog-friendly ingredients you probably already have like yogurt, peanut butter, and cornstarch and it sets beautifully without any artificial sugars or weird additives.
Whether you’re baking birthday pupcakes, frosted biscuits, or just want to spoil your pup with something extra special, this icing adds that Pinterest-worthy touch safely and affordably.
So let’s grab a mixing bowl, roll up our sleeves, and get to the fun part.
Why You Should Make Dog-Safe Icing at Home
Making your own dog icing isn’t just about looks it’s about knowing exactly what’s going into your dog’s treats.
Unlike human frosting, dog-safe icing is:
- Free of refined sugar and artificial sweeteners
- Made with dog-approved ingredients that are gentle on tummies
- Naturally colored (using things like beet powder or turmeric)
- Budget-friendly and customizable
I started making my own icing after realizing that most store-bought “dog frosting mixes” were either overpriced or contained preservatives I couldn’t even pronounce.
When you make it yourself, you’re in total control and your pup gets a treat that’s not just pretty, but genuinely healthy.
What’s Wrong With Regular Frosting?

Before we dive into the recipe, it’s worth knowing why you should avoid using human frosting on dog treats.
Here’s what makes regular icing risky for dogs:
- Too much sugar: Can lead to obesity, diabetes, and dental issues.
- Artificial sweeteners (especially xylitol): Extremely toxic for dogs, even in tiny amounts.
- Dairy overload: Most frosting uses cream cheese or butter, which can upset sensitive stomachs.
- Food coloring: Many synthetic dyes can cause allergic reactions or hyperactivity.
So if you’ve ever wondered, “Can dogs eat icing sugar?” the short answer is no. Stick to natural, dog-friendly options instead!
Ingredients You’ll Need (All Easy Amazon Finds)
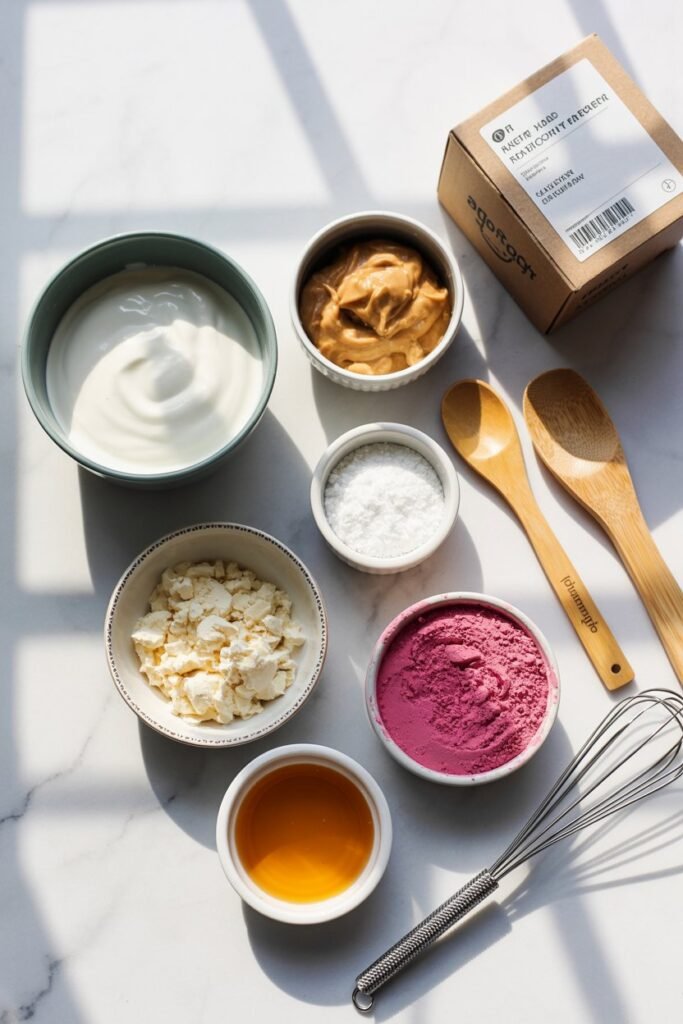
Here’s what I love about this recipe it uses simple, everyday ingredients you can grab during your next Amazon run or grocery trip.
Basic Dog Icing Ingredients
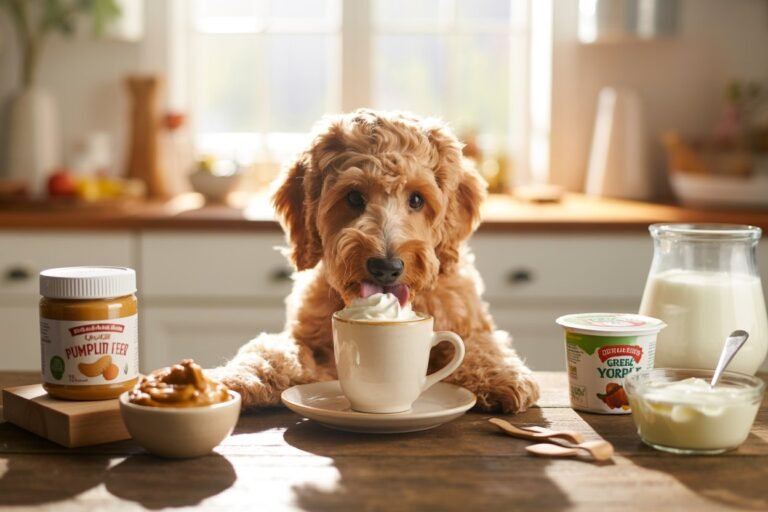
- 2 tablespoons plain Greek yogurt (unsweetened, no xylitol or flavoring)
- 1 tablespoon creamy peanut butter (make sure it’s xylitol-free)
- 1 tablespoon cornstarch or tapioca starch (helps thicken it up)
- 1–2 teaspoons water (add gradually for desired texture)
Optional:
- 1 teaspoon honey (for shine and sweetness optional but helps the icing “stick”)
- Natural coloring powders
- Beet powder (for pink)
- Turmeric (for golden yellow)
- Spirulina or wheatgrass powder (for green)
Amazon Favorites:
- Anthony’s Organic Tapioca Starch
- Teddie All-Natural Peanut Butter
- Navitas Organics Beet Powder
- Burt’s Bees Honey
Everything above is affordable, high-quality, and ships fast.
Step-by-Step: How to Make Dog-Safe Icing
This icing comes together in less than 10 minutes. Here’s the process I follow every time:
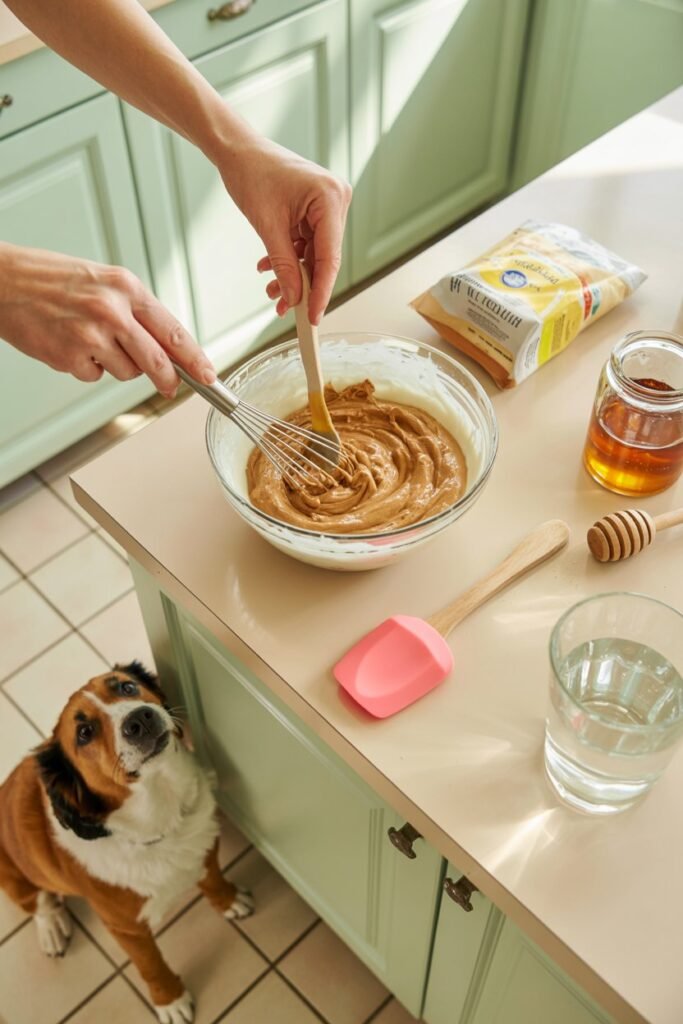
Step 1: Mix the Base
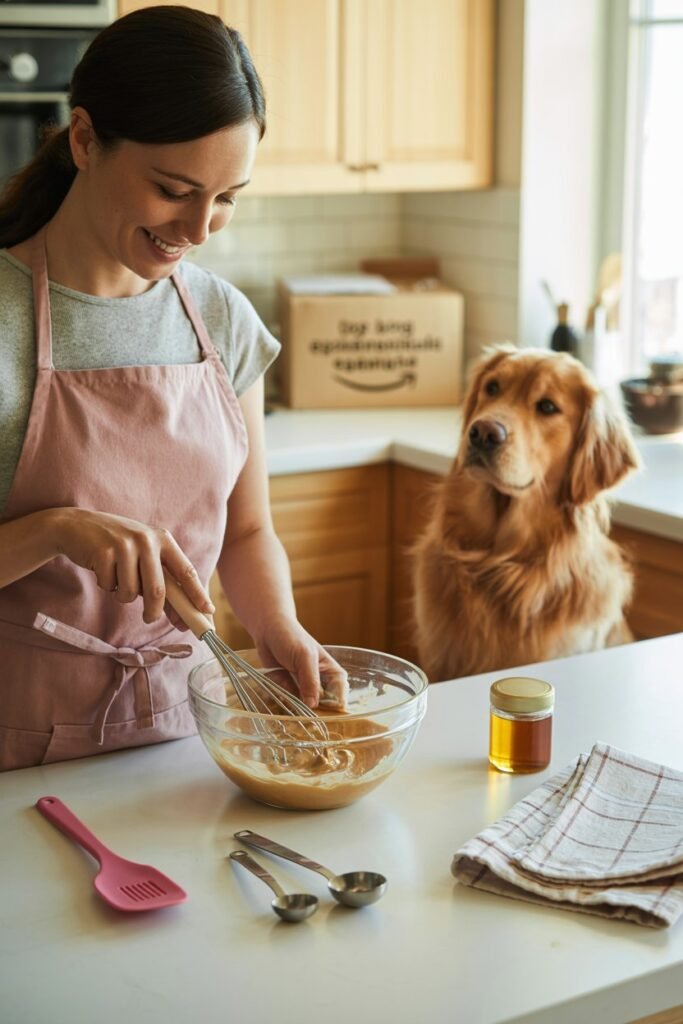
In a small bowl, combine the Greek yogurt and peanut butter.
Stir until smooth — it should look creamy, like frosting already.
If your peanut butter feels thick, microwave it for 5–10 seconds first. That’ll make it much easier to mix evenly.
Step 2: Add the Thickener
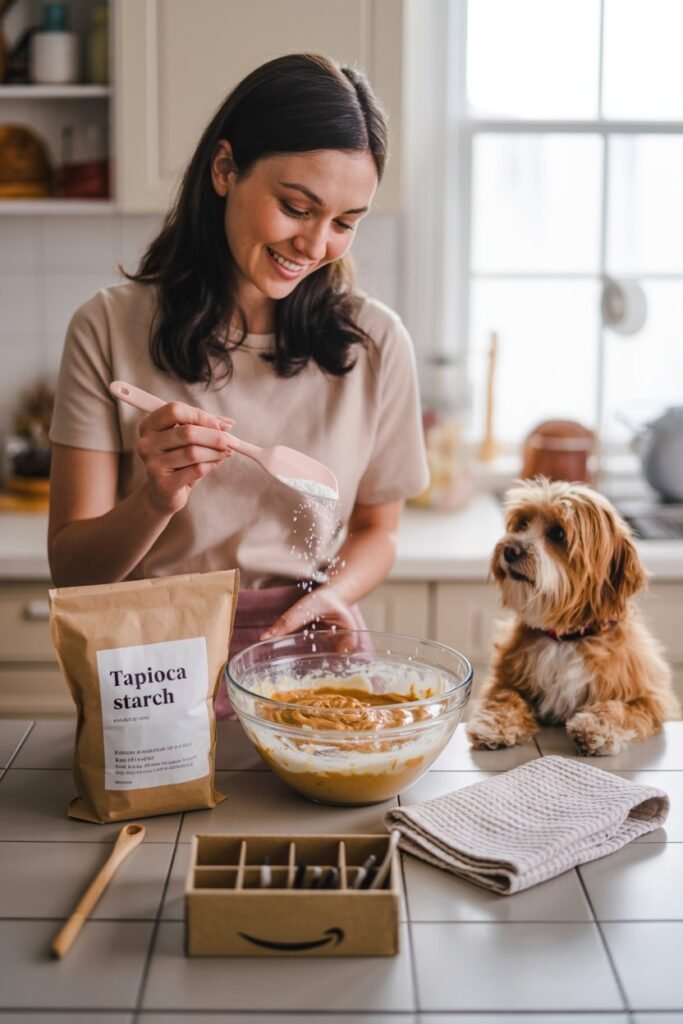
Sprinkle in the cornstarch (or tapioca starch) a little at a time.
Mix after each addition until the icing thickens into a soft, spreadable texture.
Want it thicker for piping? Add a bit more starch.
Want it runnier for drizzling? Add a drop or two of water.
It’s super forgiving you can easily tweak the consistency as you go.
Step 3: Add Natural Colors
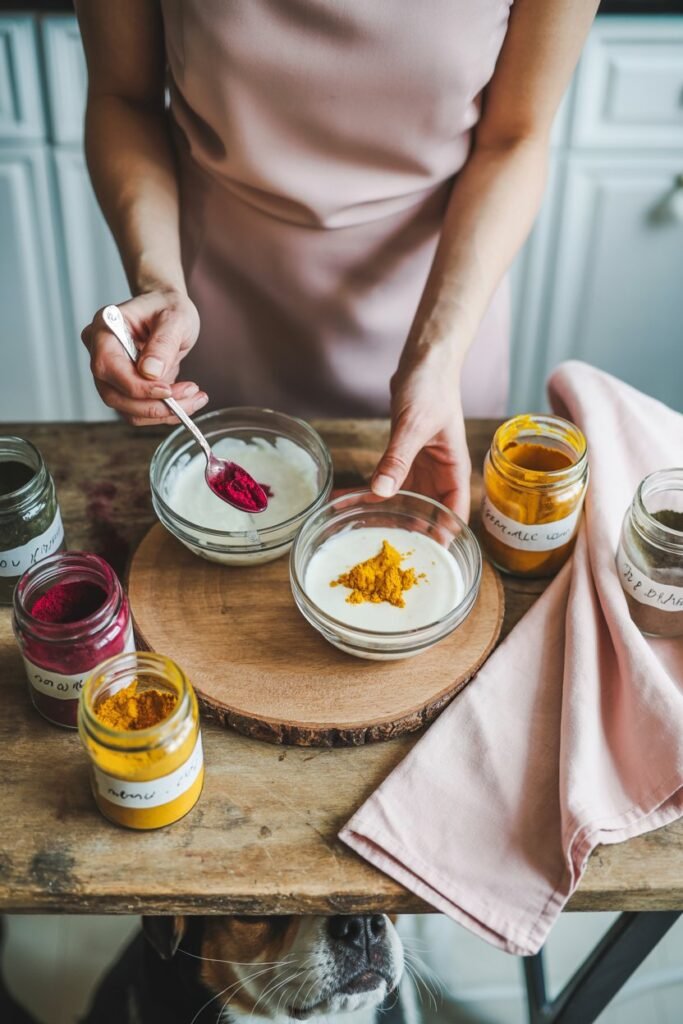
Divide your icing into separate bowls if you want multiple colors.
Add small amounts of natural coloring:
- Beet powder = pink
- Turmeric = yellow
- Spirulina = green
A little goes a long way! You’ll get pretty pastel shades that look natural no neon weirdness.
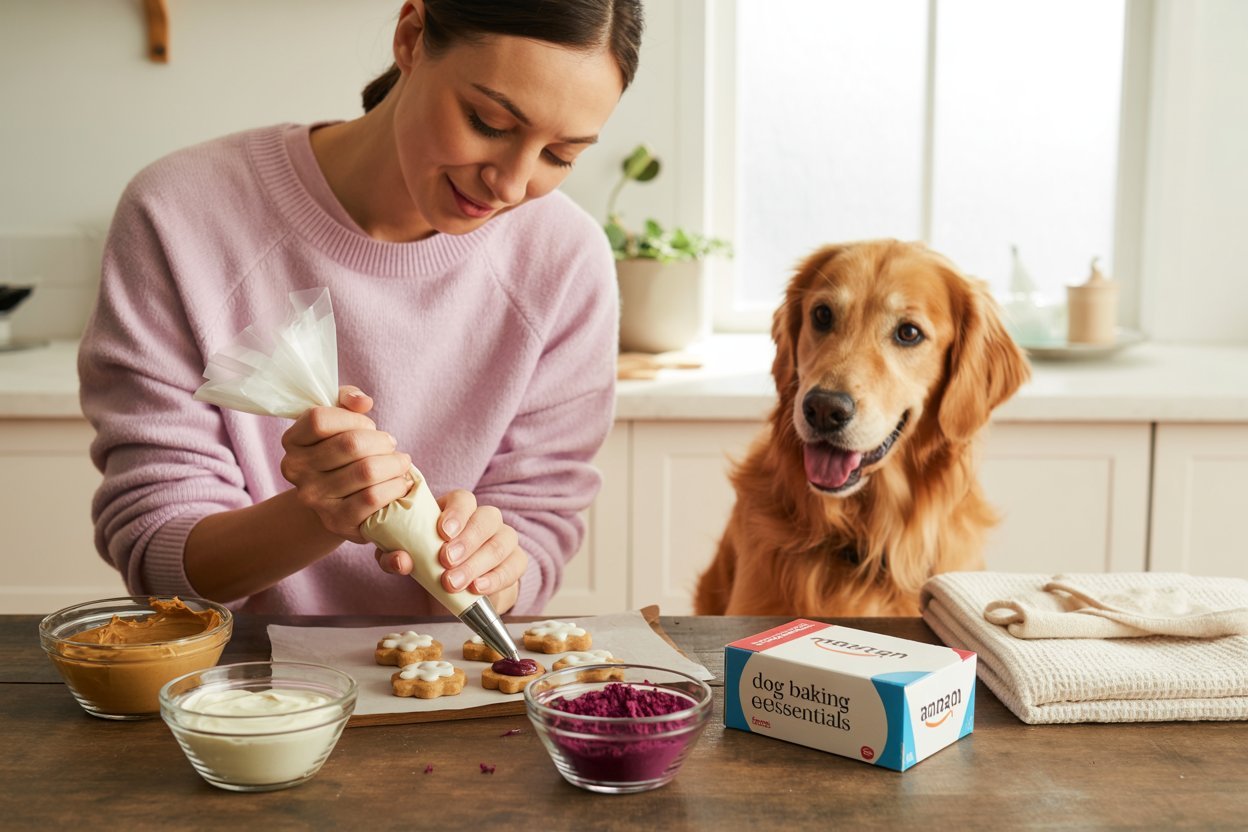
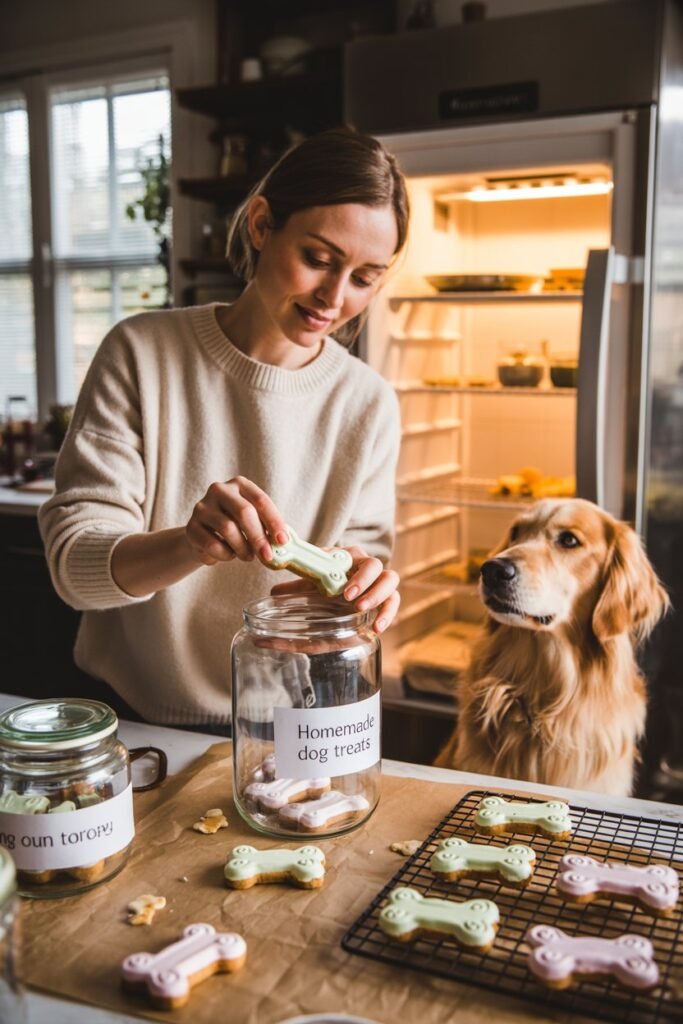
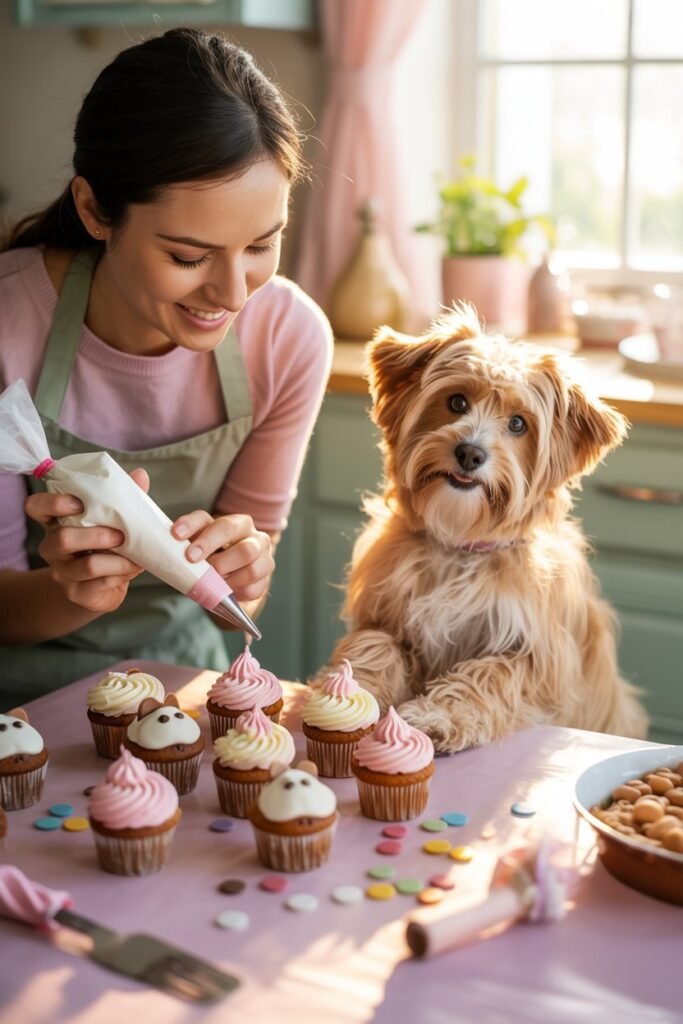
Step 4: Decorate Your Dog Treats
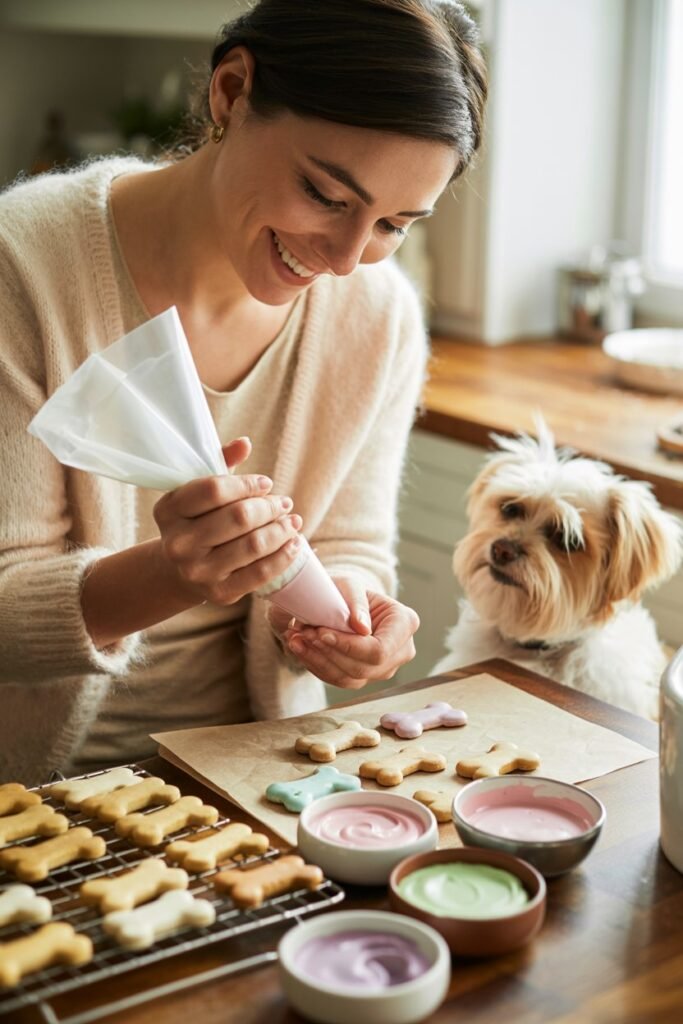
Spread the icing with a spoon or use a piping bag to create adorable designs.
If you’re icing baked biscuits, make sure they’re completely cooled before decorating otherwise the icing can melt or slide off.
Let the treats chill in the fridge for about 30 minutes. This helps the icing firm up nicely.
Dog Icing Variations You’ll Love

Depending on your pup’s preferences (and what’s in your pantry), here are three easy variations you can try.
1. Coconut Icing (Glossy & Light)

Perfect for shiny glazed biscuits.
You’ll need:
- 2 tbsp coconut oil (melted)
- 1 tbsp cornstarch
- 1 tbsp Greek yogurt
Whisk together and let cool slightly. Once brushed onto treats, it hardens into a soft sheen looks beautiful!
2. Banana Icing (Naturally Sweet & Soft)
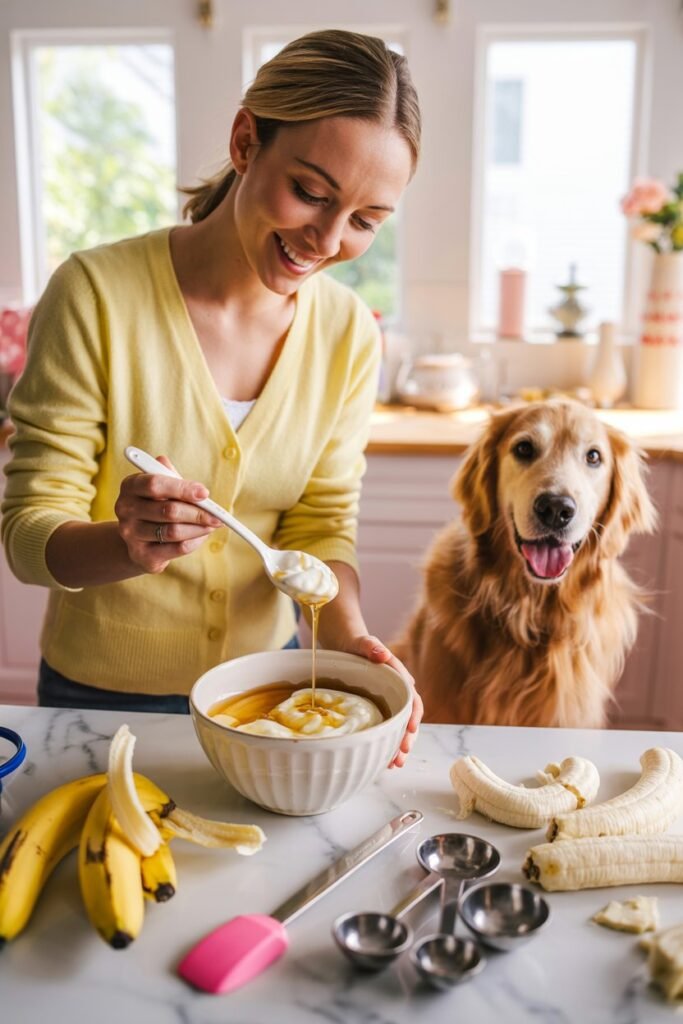
My go-to for cupcakes or birthday cakes!
You’ll need:
- 1 ripe banana (mashed)
- 1 tbsp peanut butter
- 1 tsp tapioca starch
Mix until creamy. This one doesn’t “set” as firmly as yogurt icing but adds lovely flavor and color.
3. Carob Icing (Chocolate Look-Alike)
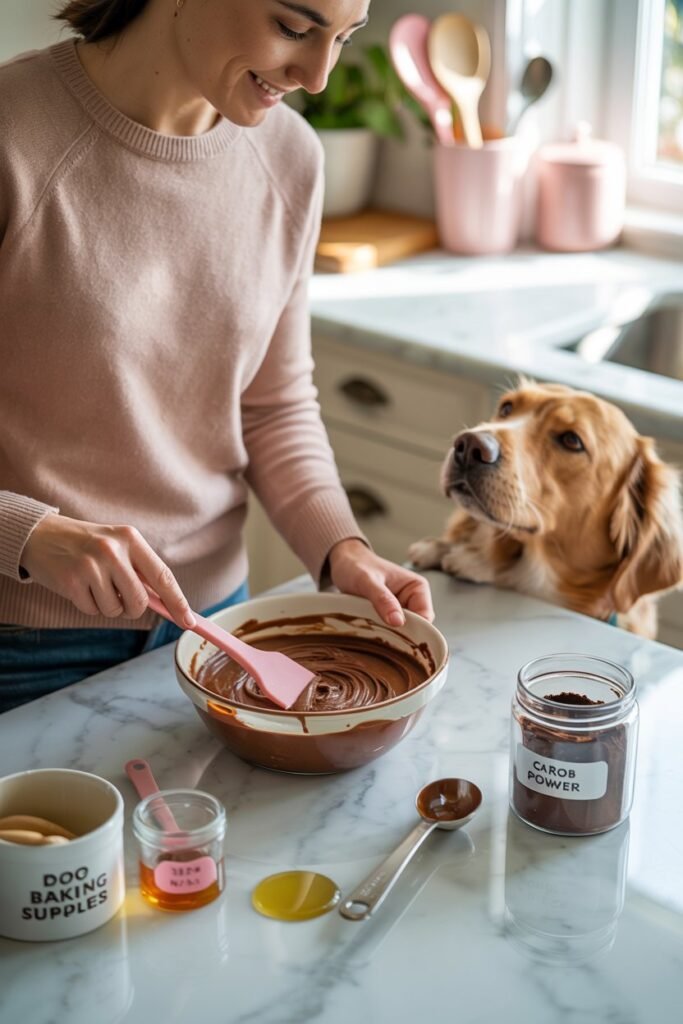
Safe for dogs, and it gives that chocolatey appearance we love.
You’ll need:
- 1 tbsp carob powder
- 1 tbsp Greek yogurt
- 1 tsp honey
Mix until smooth, then spread or drizzle. Looks amazing on peanut-butter treats!
How to Store Homemade Dog Icing
Because this icing is made with fresh ingredients, it won’t last as long as commercial frosting but that’s a good thing! It means no preservatives.
Here’s how to keep it fresh:
- In the fridge: Up to 5 days in a sealed container.
- In the freezer: Up to 2 months (freeze pre-iced treats for convenience).
If it thickens after refrigeration, just stir in a few drops of water or yogurt to loosen it up again.
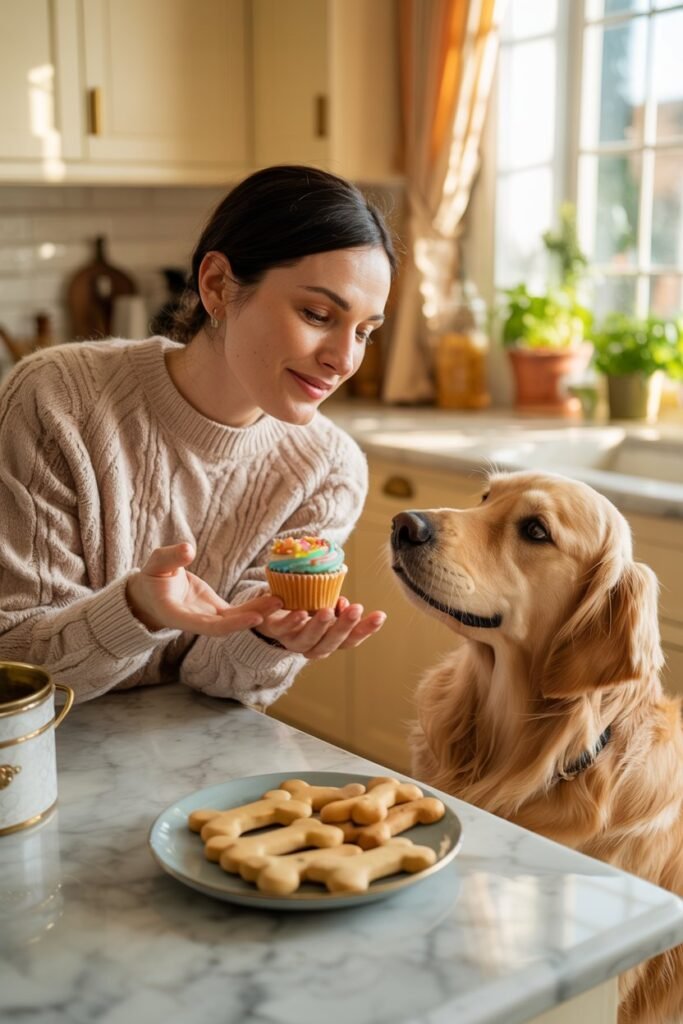
Fun Ways to Use Your Dog Icing
This icing is so versatile! Here are a few of my favorite uses:
- Decorate homemade biscuits with your pup’s name or little paw prints.
- Top “pupcakes” for birthdays, holidays, or adoption-day celebrations.
- Use as a dip for apple slices or banana bites.
- Freeze into cute molds (like paw prints or bones) for summer treats.
Pro tip: Use a piping bag with a small round tip to make paw-print dots or cute hearts. It’s easier than it looks!
Frequently Asked Questions About Dog Icing
1. Can Dogs Eat Regular Icing Sugar?
No it’s best to avoid it. Regular icing sugar is pure sucrose and can cause energy spikes, dental problems, and even digestive upset in dogs.
2. Can I Use Cream Cheese or Butter?
You can use a small amount of cream cheese if your dog tolerates dairy, but avoid butter it’s too fatty and can cause stomach issues.
3. How Long Does Dog Icing Take to Dry?
In the fridge, it usually sets within 30–60 minutes. For a firmer texture (like if you’re packaging treats), let them chill for a few hours.
4. Can I Use Food Coloring?
Only use natural coloring powders or pure fruit/veggie purées (like beet juice, carrot, or spinach). Avoid synthetic dyes.
5. My Icing Isn’t Thick — What Did I Do Wrong?
It just needs more starch! Add a little extra cornstarch or tapioca starch, one teaspoon at a time, until it reaches the right texture.
My Favorite Amazon Finds for Icing & Dog Treat Decorating
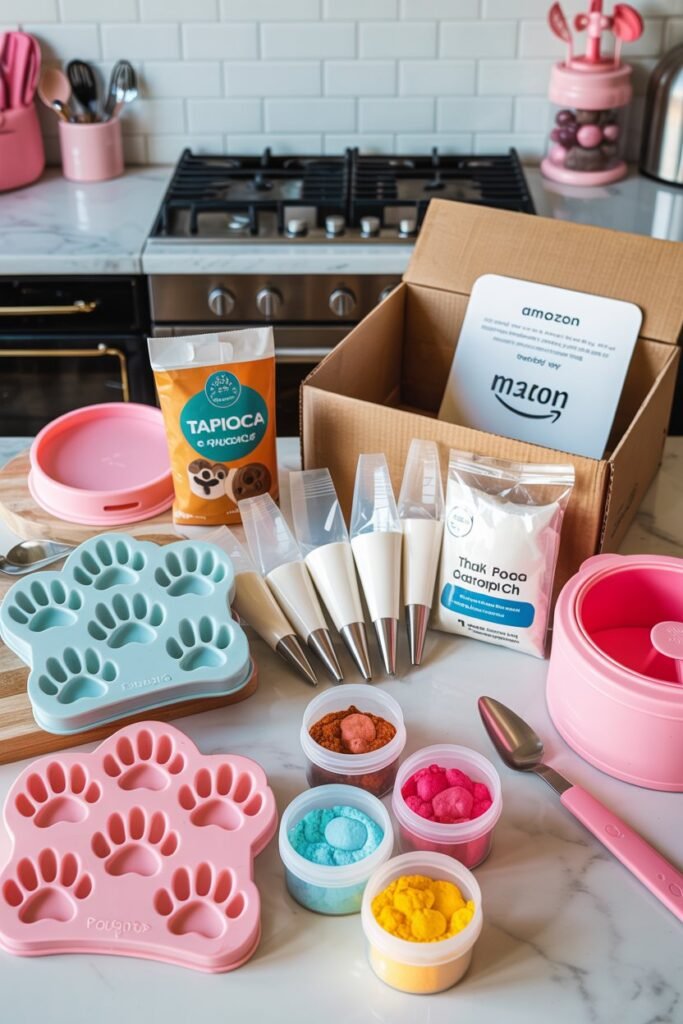
| Product | Use | Why I Recommend It |
|---|---|---|
| Silicone Paw Print Molds | For cute frozen or baked treats | Reusable, non-stick, dishwasher-safe |
| Reusable Piping Bags Set | Decorating like a pro | Comes with multiple tips, easy cleanup |
| Tapioca Starch (Anthony’s) | Thickening icing | Great texture, gluten-free |
| Natural Food Coloring Powder Kit | Safe, plant-based colors | Vibrant but non-toxic |
| Cute Airtight Treat Jars | Storing iced biscuits | Keeps them fresh longer, looks aesthetic |
All of these are under $15 and make homemade dog-treat days so much easier.
Natural Color Ideas for Dog Icing

If you love adding pops of color, try these healthy natural options:
| Color | Ingredient | Notes |
|---|---|---|
| Pink | Beet powder or strawberry purée | Just a pinch for soft pink |
| Yellow | Turmeric | Use sparingly — strong color |
| Green | Spirulina or wheatgrass | Adds nutrients too |
| Brown | Carob powder | Chocolate-like look |
| White | Coconut oil + cornstarch | Clean, classic base |
A Few Extra Tips From Experience
- Always check ingredients for xylitol especially peanut butter. Even trace amounts are toxic for dogs.
- Let treats cool completely before icing warmth melts the frosting.
- Keep portions small. Even healthy icing should be a special treat, not an everyday snack.
- Use parchment paper when drying iced treats to prevent sticking.
- If you’re photographing your creations (for Pinterest or Insta!) chill them first the icing will look smooth and professional.
Final Thoughts: Because Every Dog Deserves a Little Fancy
Making dog icing isn’t just about making cute treats it’s about creating little moments of love. I always say: when you take the time to decorate your pup’s treats, you’re celebrating your bond in the sweetest way possible.
This easy dog icing recipe is proof that homemade doesn’t have to mean complicated. With a few basic ingredients and a little creativity, you can turn everyday biscuits into something special something your dog will wag about and you’ll be proud to share.
So go ahead grab that whisk, make a little mess, and have fun with it. Your pup will love every lick (and you’ll love every tail wag).