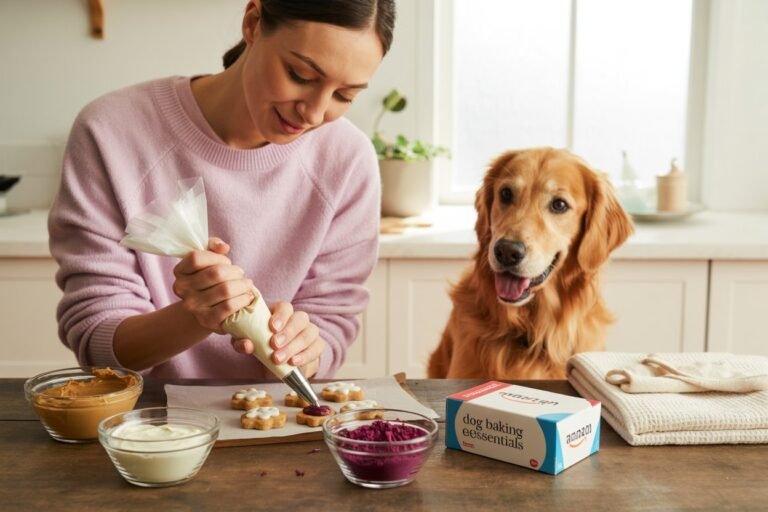

When it comes to homemade snacks, there’s something incredibly satisfying about making your own batch of crunchy, fragrant dog treats especially when they involve two of the most beloved flavors: bacon and cheese.
These Bacon & Cheese Dog Treats are crisp, rich, and full of savory aroma.

They bake up beautifully golden and smell like something straight from a breakfast kitchen.
The moment you pull them from the oven, you’ll know you’ve made something special.
Unlike store-bought biscuits, which often include fillers and preservatives, these treats use only whole, recognizable ingredients the kind you already have in your pantry.
They’re simple to make, full of flavor, and a wholesome way to spoil your dog without compromise.
The Inspiration Behind Bacon & Cheese Treats
There’s a reason this classic combination never goes out of style. Bacon delivers that irresistible smoky aroma dogs instantly recognize, while cheese adds richness, texture, and natural saltiness. Together, they make a balanced, satisfying bite that keeps dogs coming back for more.

When developing this recipe, the goal was to create something crunchy but not rock-hard, flavorful but still healthy enough for regular snacking. The balance comes from using just the right ratio of protein to flour enough to form a firm dough without sacrificing taste or texture.
These treats aren’t just indulgent; they also have real nutritional value. Bacon and cheese, when used moderately, are excellent sources of protein, calcium, and essential fatty acids all vital for maintaining strong muscles, bones, and a glossy coat.
Pro Tip: Use low-sodium ingredients wherever possible. Dogs have much more sensitive sodium requirements than humans, so moderation keeps this treat safe and balanced.
What Makes Homemade Treats Worth It

Baking your own treats gives you complete control over every ingredient no artificial colors, no fillers, and no excess salt or sugar.
Beyond that, there’s a real sense of connection in preparing something by hand for your dog. You know exactly what goes in, you can adjust the recipe to their preferences, and you can even make small modifications for dietary needs (for example, using oat flour for gluten-sensitive dogs).
Plus, these treats double as a fun family project. The dough is easy to handle, so even kids can help roll and cut out shapes. You can store them for weeks and make big batches for gift jars or training rewards.
Ingredients You’ll Need
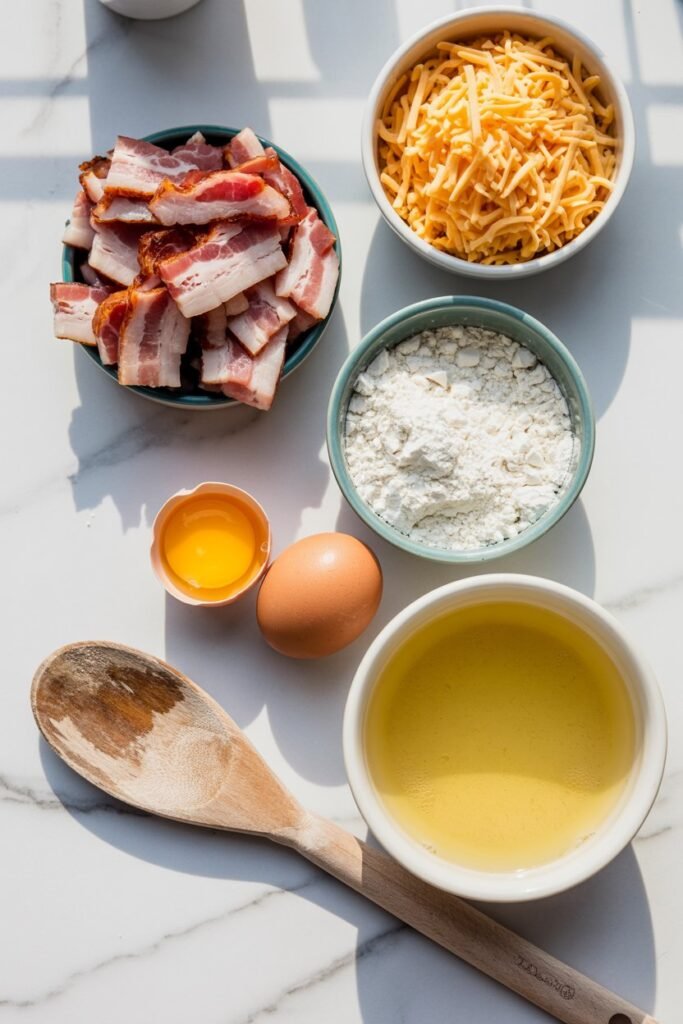
The beauty of this recipe lies in its simplicity just a handful of everyday ingredients that come together effortlessly.
Ingredients:
- 1 cup whole wheat flour – Adds fiber and structure; you can also use oat flour for a softer bite.
- ½ cup cooked bacon, finely chopped – Choose low-sodium, lean strips, and make sure all grease is drained.
- ½ cup shredded cheddar cheese – Mild cheddar or mozzarella works best; go for low-sodium options.
- 1 large egg – Helps bind the dough while adding protein.
- ¼ cup water or low-sodium chicken broth – Adds just enough moisture to form the dough.
Pro Tip: Always cool your cooked bacon completely before adding it to the mix. Hot grease can melt the cheese prematurely, making the dough sticky.
How to Make Bacon & Cheese Dog Treats
This recipe is easy to follow and beginner-friendly. You’ll only need one bowl, a rolling pin, and a baking tray.
Step 1: Combine Wet Ingredients

In a medium mixing bowl, whisk together the egg and water (or broth) until smooth and slightly frothy. This forms the liquid base that will bind everything together.
If you’re using chicken broth, make sure it’s unsalted or labeled low-sodium. Many commercial broths are high in sodium and aren’t suitable for dogs.
Step 2: Add Bacon and Cheese
Stir in the finely chopped cooked bacon and shredded cheese. Mix well so that both ingredients are evenly distributed.
This is where the aroma really starts to fill the kitchen the warmth of the bacon and cheese together is irresistible.
Pro Tip: Using a hand mixer with a dough hook or paddle attachment helps ensure the bacon and cheese spread evenly through the dough.
Step 3: Add Flour and Form the Doug
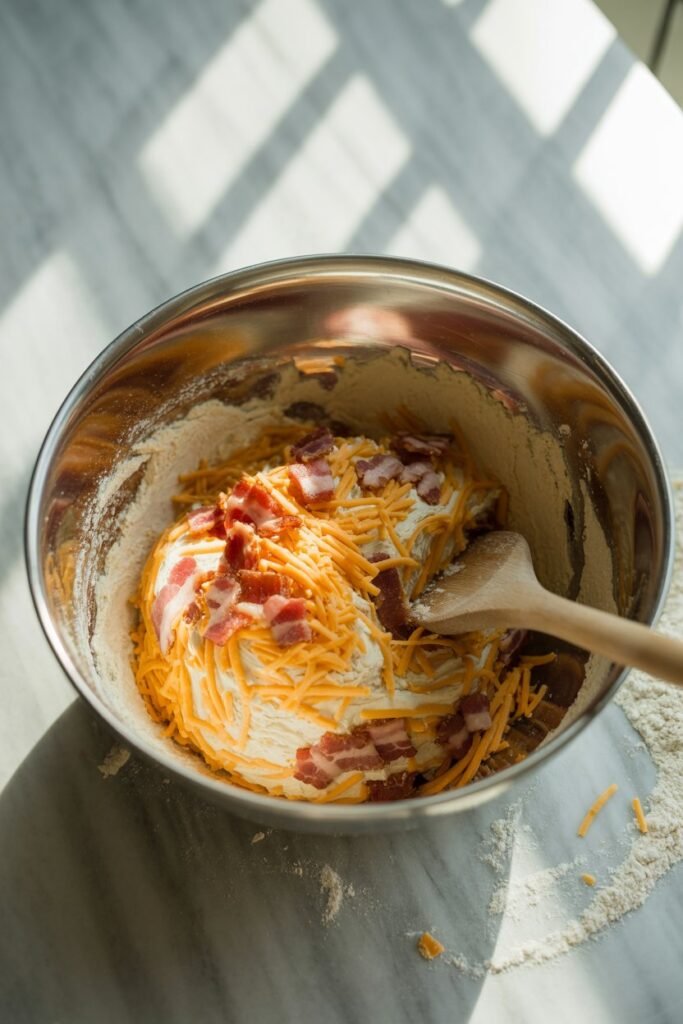
Gradually add the flour into the wet mixture, about ¼ cup at a time. Mix gently until a dough starts to come together.
Once most of the flour is incorporated, use your hands to knead the dough lightly. It should be firm but pliable — similar to a soft cookie dough.
If it feels sticky, sprinkle in a bit more flour. If too dry, add a teaspoon of water or broth at a time until it comes together.
Step 4: Roll Out the Dough
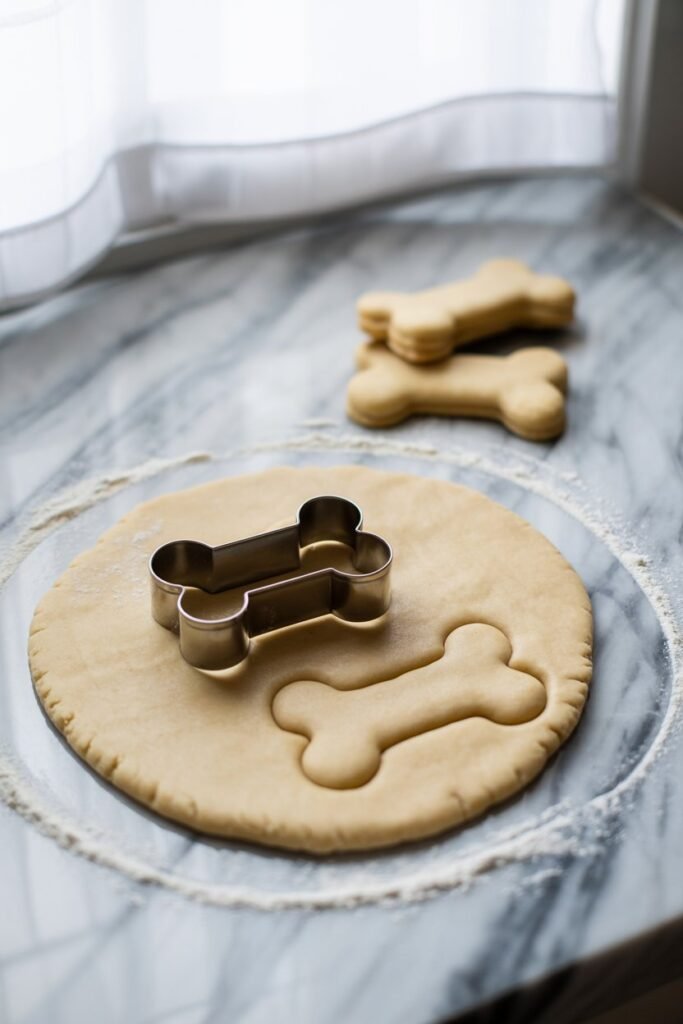
Dust your countertop lightly with flour. Roll the dough to about ¼ inch thick. Try to keep the thickness even for consistent baking.
You can use cookie cutters in fun shapes like bones or hearts, or simply slice the dough into small squares with a knife.
Pro Tip: Chilling the dough for 10–15 minutes before rolling helps firm it up, making it easier to cut precise shapes.
Step 5: Bake to Perfection

Preheat your oven to 350°F (175°C).
Line a baking sheet with parchment paper or a silicone baking mat.
Arrange the cut-out treats evenly, leaving a small gap between each piece. Bake for 20–25 minutes, or until they’re golden brown around the edges.
For an extra crunch, turn off the oven and let the treats sit inside as the oven cools for another 10 minutes.
Step 6: Cool Completely
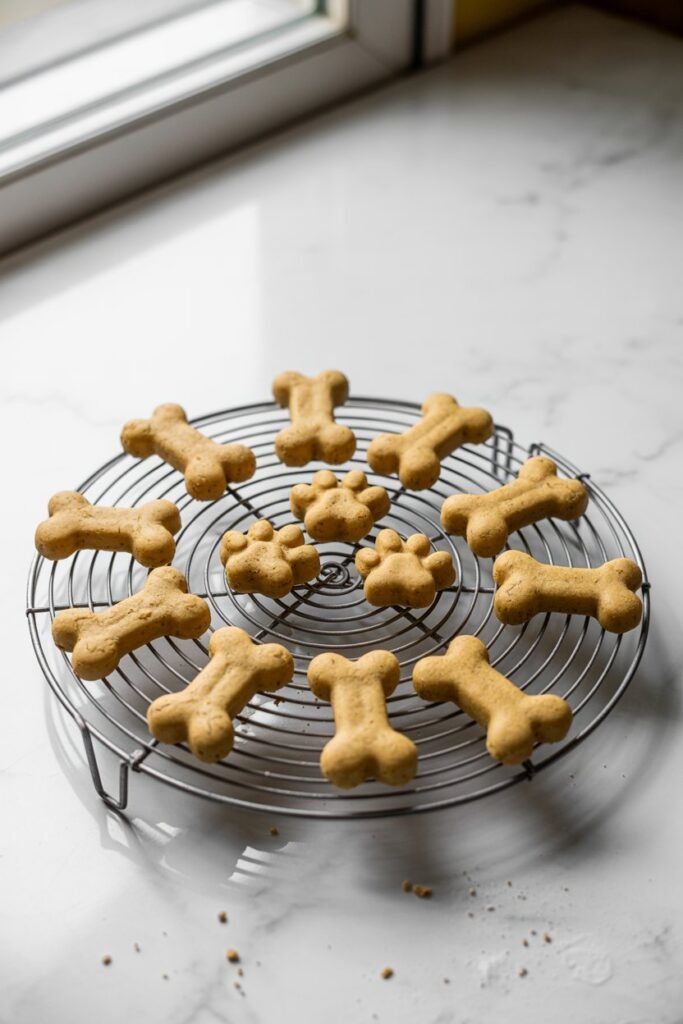
Remove the treats and let them cool on a wire rack. Cooling completely is essential — warm treats retain moisture, which can cause sogginess and shorten their shelf life.
As they cool, they’ll firm up beautifully, developing a light, crisp texture that’s perfect for chewing.
Storage and Shelf Life
Homemade dog treats don’t contain preservatives, so proper storage keeps them fresh longer.
- Room Temperature: Store in an airtight container for up to 7 days.
- Refrigerator: Keeps for 3 weeks in a sealed jar or container.
- Freezer: Lasts up to 3 months. For easy access, freeze in small batches and thaw overnight.
If you notice any softness or moisture after storage, pop the treats back in the oven at 325°F for 5 minutes to re-crisp.
Pro Tip: Store with a small food-safe silica gel packet or a piece of uncooked rice paper to absorb moisture naturally.
Serving Ideas

These treats are versatile perfect for training, special rewards, or a mid-day snack.
- Training Rewards: Cut smaller pieces for quick, easy reinforcement.
- Meal Toppers: Crumble over kibble to enhance mealtime excitement.
- Gift Jars: Package them in small mason jars for homemade gifts.
Portion Tip: One small biscuit (about 1 inch) is suitable for a medium-sized dog; adjust accordingly by weight and daily calorie intake.
Nutritional Notes
Every ingredient in this recipe serves a purpose:
| Ingredient | Benefit |
|---|---|
| Bacon | Adds protein and natural flavor; use sparingly for balance. |
| Cheese | Provides calcium, protein, and healthy fats. |
| Whole Wheat Flour | Adds fiber for digestive health and texture. |
| Egg | Binds ingredients and boosts protein content. |
| Chicken Broth | Adds flavor while keeping the dough moist. |
These treats are intended as occasional snacks, not meal replacements. If your dog has specific dietary restrictions or sensitivities, always consult your vet before introducing new ingredients.
Recipe Variations

You can easily tweak this recipe depending on what you have in your pantry or your dog’s preferences:
- Chicken & Cheese Treats: Replace bacon with finely shredded cooked chicken.
- Parsley & Cheddar: Add 1 tablespoon of fresh chopped parsley for a fresh aroma and breath benefits.
- Crispy Crunch Version: Roll thinner and bake 5 minutes longer for extra crunch.
- Soft-Bite Treats: Substitute half the flour with oat flour and bake for a shorter time.
Troubleshooting Common Issues
Dough too dry?
Add 1 teaspoon of water or broth at a time until it forms a pliable texture.
Treats too soft?
Bake for an additional 3–5 minutes or leave them in the oven with the door slightly open while cooling.
Treats spreading too much?
Chill the dough before cutting to help it hold shape during baking.
Uneven browning?
Rotate your tray halfway through baking for consistent results.
Frequently Asked Questions
Can I use turkey bacon instead of pork?
Yes. Turkey bacon is leaner and has less sodium, making it a healthier option.
Can I freeze the dough?
Absolutely. Wrap in plastic, then seal in a freezer bag for up to 1 month. Thaw before rolling.
What kind of cheese works best?
Mild cheddar, mozzarella, or Colby Jack. Avoid strong or moldy cheeses like blue cheese.
Can I make smaller treats for training?
Yes, just cut them smaller and reduce baking time slightly around 15 minutes for bite-sized pieces.
Final Thoughts
There’s something heartwarming about baking simple, wholesome snacks that your dog genuinely loves. These Bacon & Cheese Dog Treats deliver everything you’d want real flavor, crunchy texture, and nutritious balance all from ingredients you can trust.
With just a few minutes of prep and a single baking tray, you’ll have a jar full of golden, savory biscuits that make every tail wag a little faster.
And once you’ve tried this recipe, it’s easy to customize switch up the protein, sprinkle in herbs, or adjust the bake time for your dog’s texture preference. Either way, the result will always be the same: one happy, hungry dog.