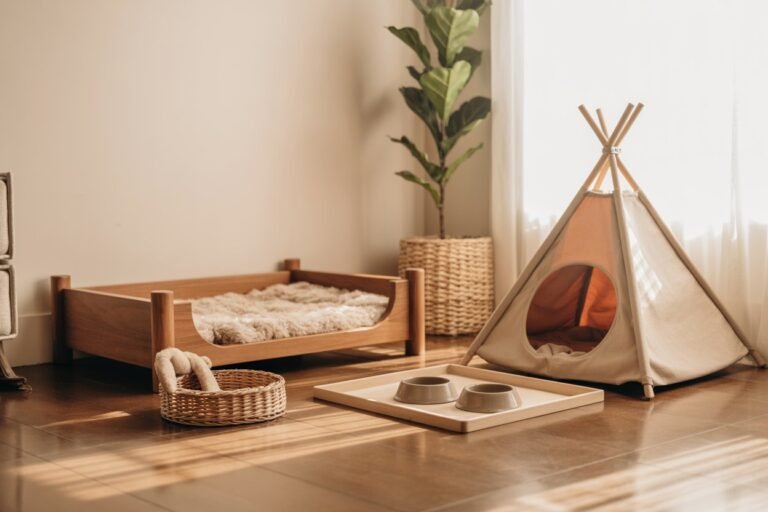
12 DIY Dog Run Cheap Ideas
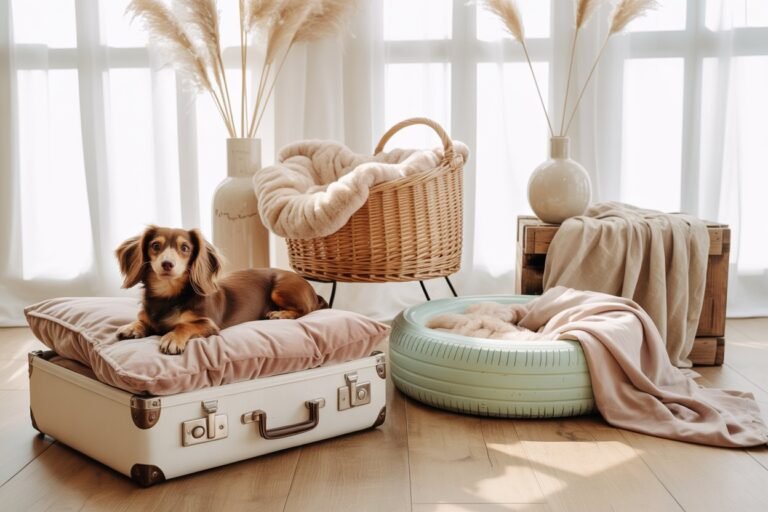
Creating a safe, happy space for your dog to run freely changes everything specially when you’re juggling busy days, limited yard space, or a budget that doesn’t quite stretch to those expensive pre-made kennels.
A thoughtfully built DIY dog run gives your pup freedom without sacrificing safety. It gives you peace of mind. And most importantly, it creates a little world that belongs just to your dog a place where they can stretch, sniff, play, and simply be.
This guide walks you through 12 affordable dog run ideas with detailed, step-by-step instructions. Whether you’re working with a tiny backyard, a side yard, or even a temporary outdoor space, you’ll find something here that fits beautifully into your life.
Let get into this 12 DIY Dog Run Cheap Ideas
Why a DIY Dog Run Is Worth It
Before we dive into the builds, let’s talk about why this matters so much.
A dog run isn’t just about containment it’s about enrichment, structure, and safety.
A Good Dog Run Helps You:
- Keep your dog safe when you’re not supervising every second
- Prevent destructive boredom behaviors
- Create a designated potty and play area
- Protect your garden or lawn
- Give high-energy dogs a healthy outlet
And the best part? You don’t need hundreds (or thousands) of dollars to make it happen.
How to Plan Your Dog Run (Before You Build Anything)
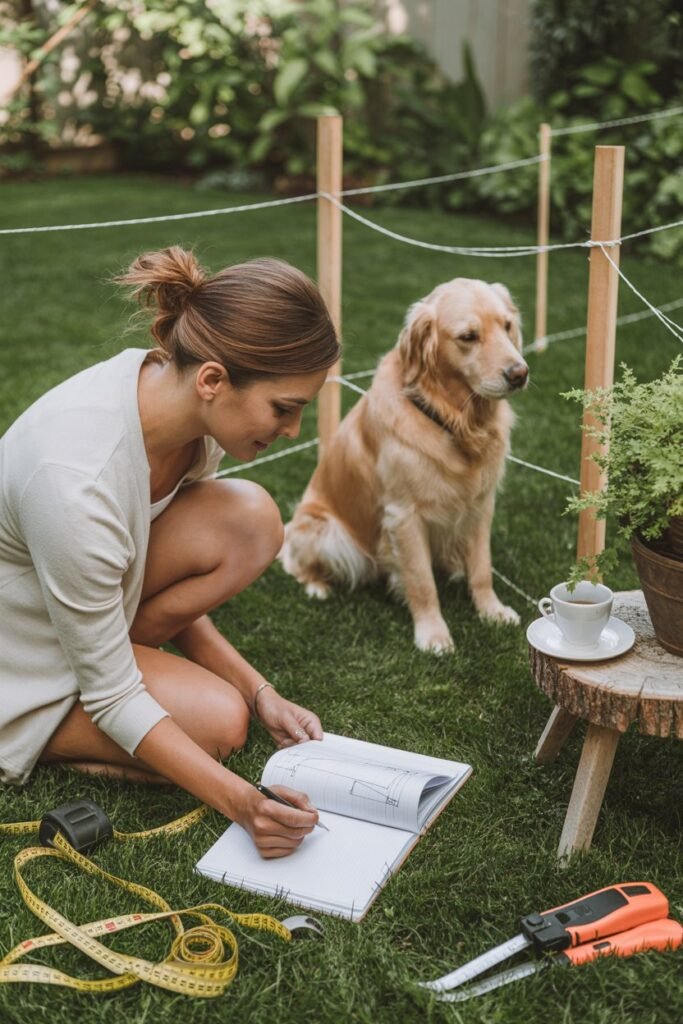
This is the step most people rush and it’s the one that makes everything else easier.
1. Measure Your Space Thoughtfully
Think about:
- How much room your dog actually needs to move comfortably
- Where sunlight hits during the day
- Drainage (avoid areas that collect water)
2. Consider Your Dog’s Personality
Be honest here it matters.
- Jumpers → need taller fencing
- Diggers → need reinforced ground edges
- Chewers → avoid soft wood or weak mesh
- Escape artists → double-secure everything
3. Choose the Right Ground Surface
Each has pros and cons:
- Gravel → best for drainage
- Grass → natural but wears out fast
- Artificial turf → clean and low-maintenance
- Dirt → cheapest but messy
4. Always Plan for Shade
Your dog should never be stuck in direct heat. Even a simple tarp can make a huge difference.
1. Simple Fence Panel Dog Run (Beginner-Friendly & Fast)
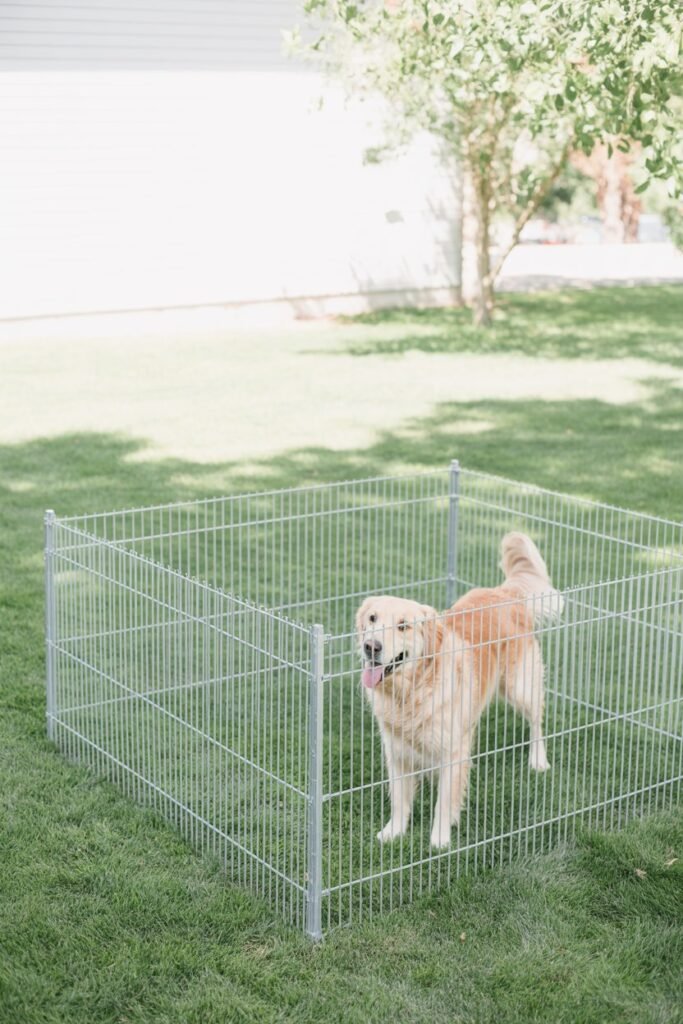
This is the “start today, finish today” option and it’s perfect if you’re not into complicated builds.
What You’ll Need:
- Pre-made fence panels (metal or wire)
- Zip ties or panel connectors
- Ground stakes
- Optional latch for entry
Step-by-Step Instructions:
- Mark your area
Use string or even shoes to outline your run shape. - Position your panels
Stand them upright and form a square or rectangle. - Connect panels securely
Use heavy-duty zip ties or clips at multiple points (top, middle, bottom). - Anchor to the ground
Push stakes through panel bases into the soil. - Create a simple gate
Leave one panel partially unattached on one side.
Cost Estimate:
- $30–$120 depending on whether panels are new or secondhand
Best For:
- Beginners
- Renters
- Temporary setups
2. Pallet Dog Run (The Cheapest Option Possible)
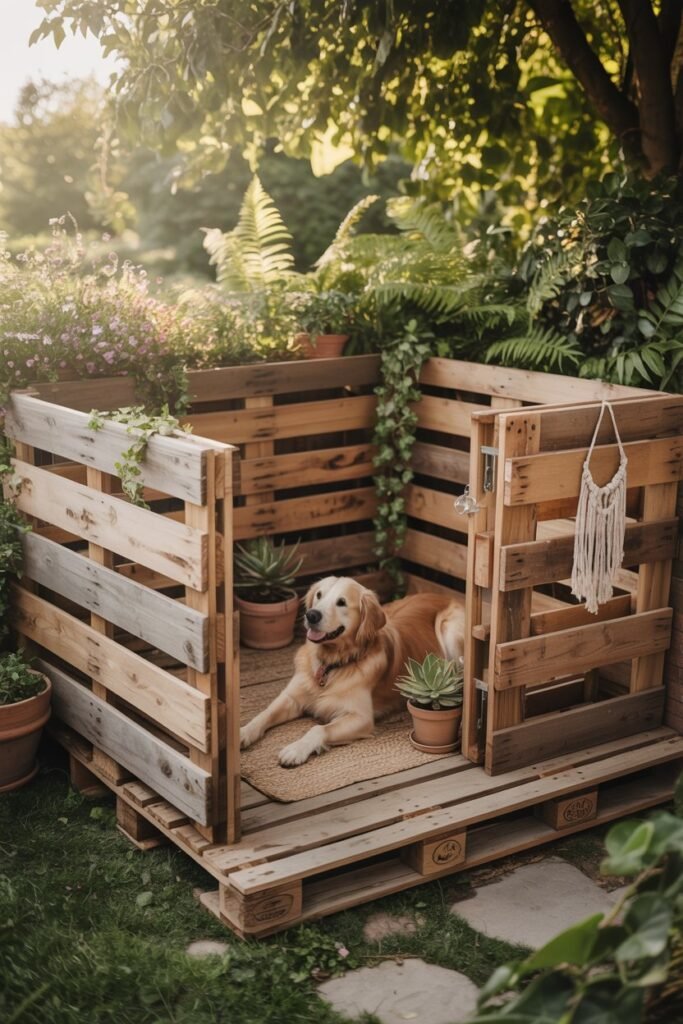
If saving money is your top priority, this one feels like a hidden gem.
What You’ll Need:
- Wooden pallets
- Nails or screws
- Hammer or drill
- Sandpaper
Step-by-Step Instructions:
- Find safe pallets
Look for heat-treated (HT) stamps. Avoid chemically treated ones. - Sand everything down
Pay attention to splinters—this step matters more than it seems. - Stand pallets upright
Form your enclosure shape. - Secure corners tightly
Screw or nail pallets together at every joint. - Reinforce weak spots
Add extra wood pieces where needed. - Create a gate section
Attach hinges if you can, or use a removable pallet.
Cost Estimate:
- $0–$40
Best For:
- Budget-conscious builds
- Rustic backyard aesthetics
3. Chain-Link Dog Run (Durable & Long-Term)

If you want something that lasts for years, this is your go-to.
What You’ll Need:
- Chain-link fencing roll
- Fence posts (metal or wood)
- Concrete mix
- Wire ties
Step-by-Step Instructions:
- Mark your layout clearly
- Dig post holes (2–3 feet deep)
- Set posts in concrete
- Let concrete cure (24–48 hours)
- Unroll chain-link fencing
- Attach fencing tightly to posts
- Install a proper gate
Cost Estimate:
- $100–$300
Best For:
- Large dogs
- Escape artists
- Permanent setups
4. Tether Line Dog Run (Minimal Effort Setup)
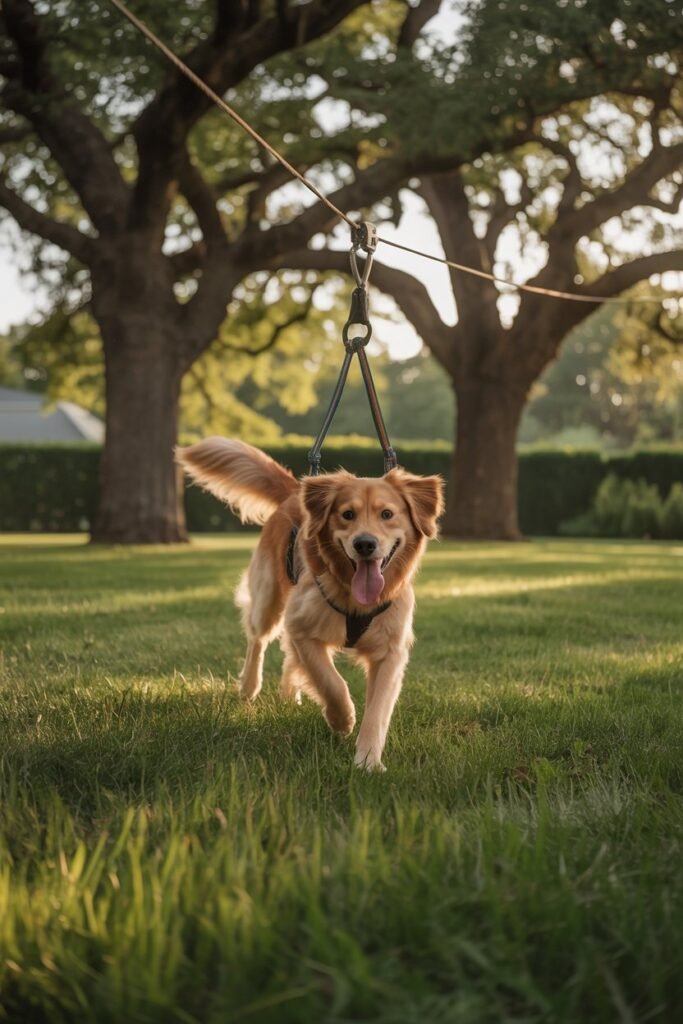
This is the simplest solution when building a full enclosure isn’t realistic.
What You’ll Need:
- Steel cable or strong rope
- Two anchor points
- Runner pulley
- Harness
Step-by-Step Instructions:
- Attach cable between two sturdy points
- Tighten and test for sagging
- Add runner pulley
- Attach your dog using a harness
Important:
Never use a collar always a harness to prevent injury.
5. PVC Pipe Dog Run (Lightweight, Custom & Perfect for Renters)
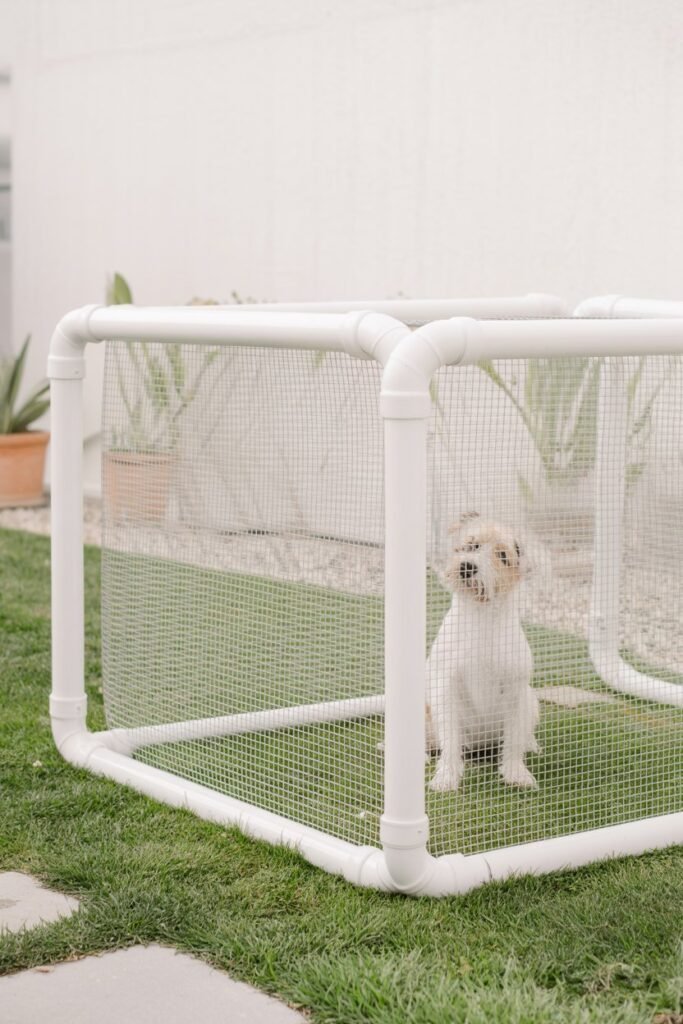
This setup is one of those surprisingly genius solutions simple materials, minimal tools, and a structure you can move anytime you need.
Why This Works So Well:
- Budget-friendly and widely available materials
- No permanent digging or damage to your yard
- Easy to take apart and reassemble
- Great for small to medium dogs
What You’ll Need:
- PVC pipes (schedule 40 works best for strength)
- PVC connectors (T-joints, elbow joints)
- Plastic mesh or wire fencing
- Zip ties or heavy-duty fasteners
- PVC cutter or saw
- Measuring tape
Step-by-Step Instructions:
1. Plan Your Dimensions
Decide your size first. A good starting point:
- Small dogs → 6×6 ft
- Medium dogs → 8×8 ft
Sketch it out it makes everything smoother.
2. Cut Your PVC Pipes
Cut pipes for:
- Base frame
- Top frame
- Vertical supports (every 2–3 feet)
3. Build the Base Frame
Connect pipes into a square or rectangle using elbow joints at corners.
4. Add Vertical Supports
Insert vertical pipes into each corner and along the sides for stability.
5. Attach the Top Frame
Mirror your base and connect it at the top this creates a sturdy box structure.
6. Wrap with Mesh
Unroll your mesh and wrap it tightly around all sides.
7. Secure Everything
Use zip ties every few inches to prevent sagging.
8. Create a Door Panel
Leave one section partially open or attach mesh with clips for easy entry.
Cost Estimate:
- $40–$120
Best For:
- Renters
- Temporary setups
- Small to medium dogs
6. Fence-Line Dog Run (Smart Space Saver for Narrow Yards)
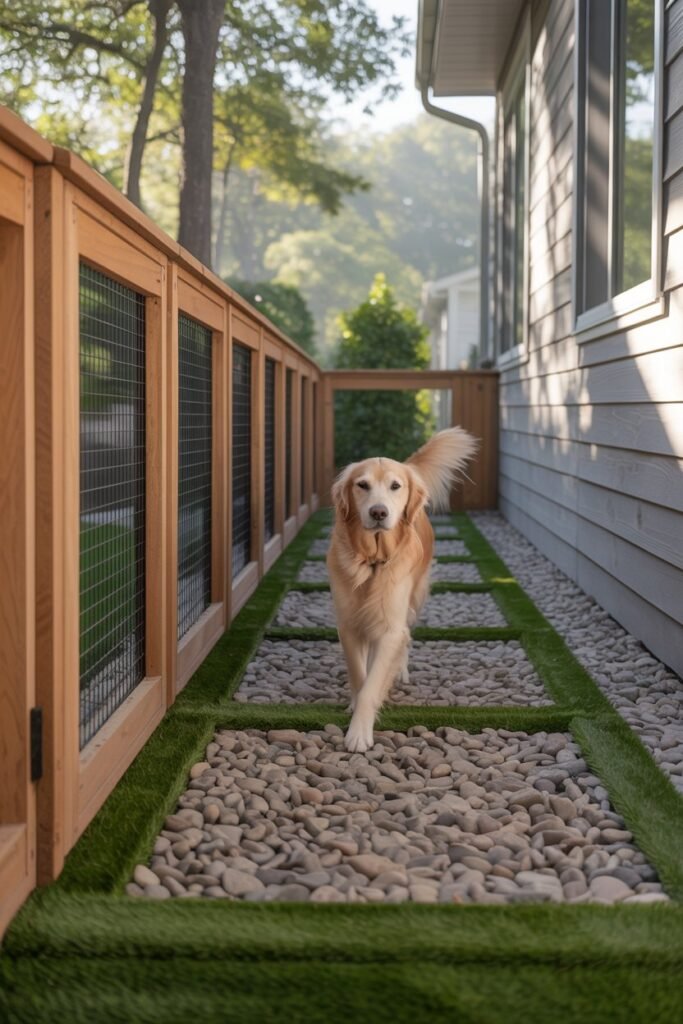
If you’ve ever looked at that narrow strip beside your house and thought, “This space is useless,” this idea will change your mind completely.
Why This Design Is So Practical:
- Uses existing fencing (cuts cost in half)
- Perfect for small or awkward spaces
- Keeps your yard looking clean and organized
What You’ll Need:
- Wire fencing or panels
- Stakes or posts
- Zip ties or wire fasteners
- Gate latch
Step-by-Step Instructions:
1. Choose Your Fence Side
Pick a straight section—side yards work beautifully.
2. Measure Width Carefully
Aim for at least 3–5 feet wide so your dog can turn and move comfortably.
3. Install the Second Barrier
Run fencing parallel to your existing fence.
4. Secure Both Ends
Close off the front and back using panels or extra fencing.
5. Anchor Everything
Use stakes or posts to prevent movement.
6. Add a Gate
Install a simple hinged or removable gate at one end.
7. Improve the Ground
Lay gravel or turf to reduce mud and mess.
Cost Estimate:
- $30–$100
Best For:
- Small yards
- Urban homes
- Dogs that enjoy pacing or patrolling
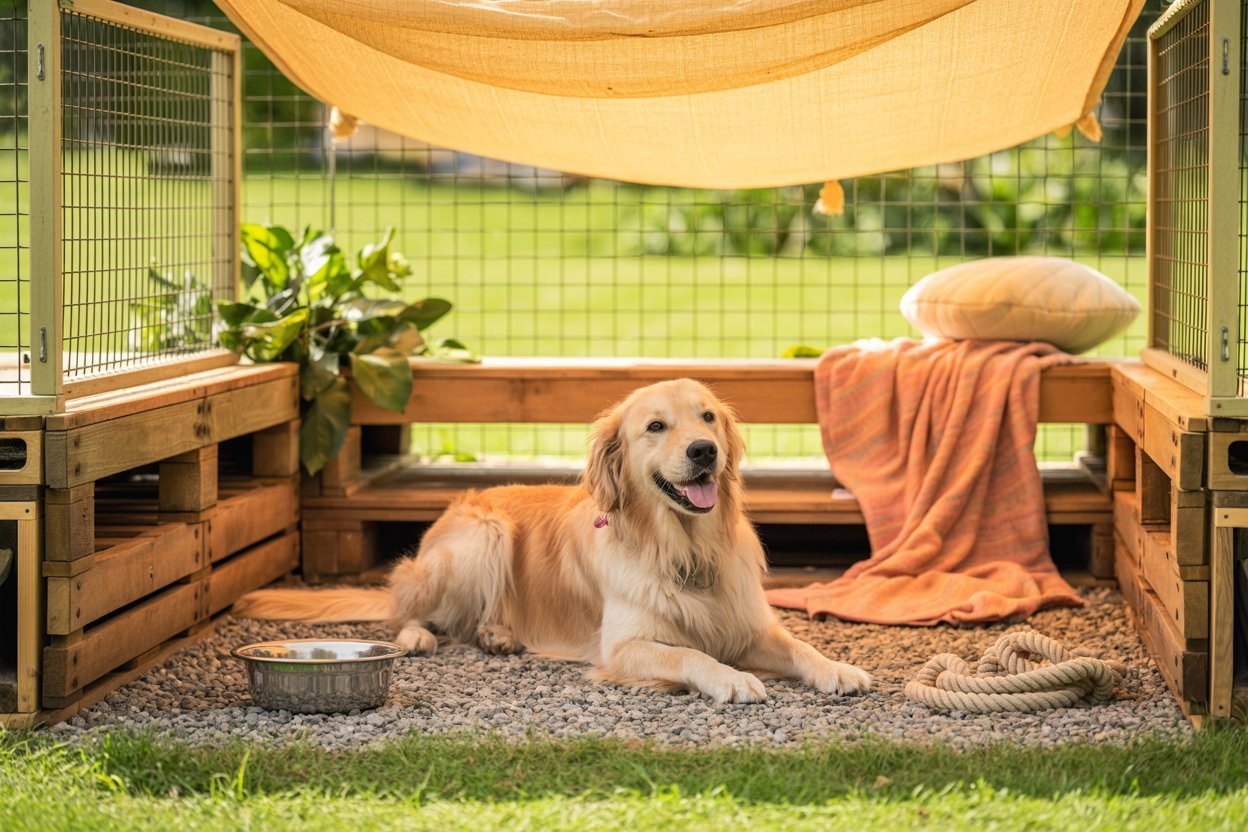
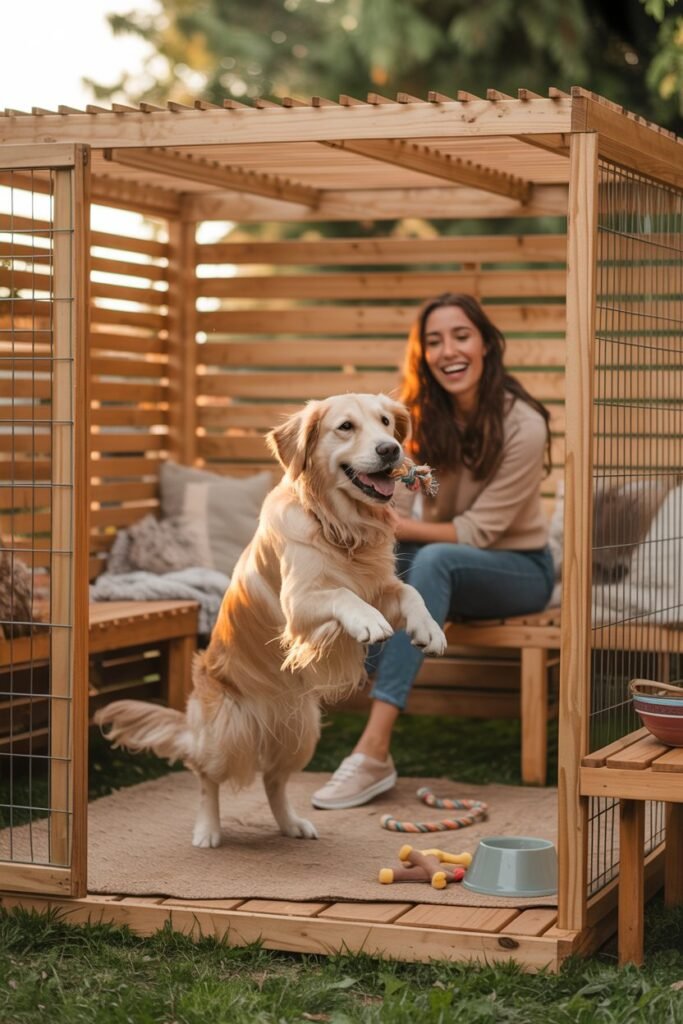
7. Covered Dog Run (Shade, Comfort & Weather Protection)
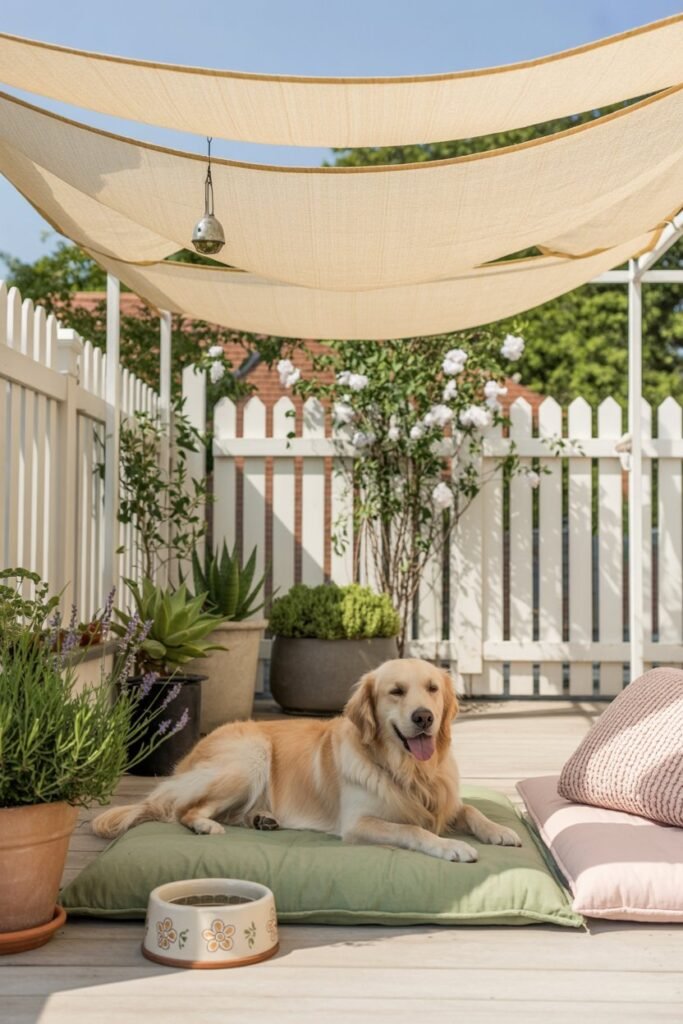
A run without shade can quickly become unsafe especially in hot weather. This upgrade is simple but so important.
Why It Matters:
- Prevents overheating
- Keeps area dry during rain
- Makes the space usable year-round
What You’ll Need:
- Tarp or shade cloth
- Rope, hooks, or bungee cords
- Existing dog run structure
Step-by-Step Instructions:
1. Measure Your Run
Know exactly how much coverage you need.
2. Choose the Right Material
- Tarp → full rain protection
- Shade cloth → better airflow
3. Attach One Side First
Secure tightly to one edge of the run.
4. Stretch Across the Top
Pull it firm to avoid sagging.
5. Secure Remaining Sides
Attach all corners tightly.
6. Create a Slope
Tilt slightly so rainwater runs off instead of pooling.
7. Check Stability
Make sure wind won’t lift it.
Cost Estimate:
- $15–$50
Best For:
- Hot climates
- Dogs that stay outside longer
- Any permanent dog run
8. Indoor-Outdoor Hybrid Dog Run (Freedom with Comfort)
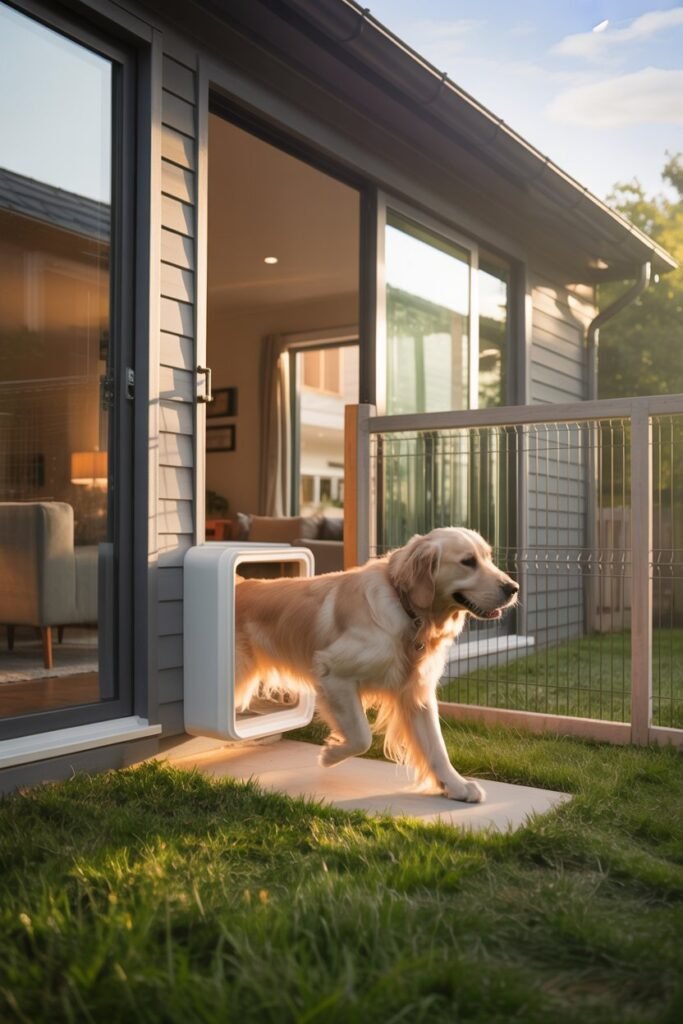
This setup blends indoor safety with outdoor freedom and once you have it, it feels like a luxury for both you and your dog.
Why This Is a Game-Changer:
- Your dog can go outside anytime
- Less accidents indoors
- Perfect for busy schedules
What You’ll Need:
- Dog door
- Small outdoor enclosure materials
- Weatherproofing materials
Step-by-Step Instructions:
1. Install a Dog Door
Choose a secure location (back door or wall).
2. Build a Small Exterior Run
Keep it directly connected to the door exit.
3. Secure All Edges
No gaps—this is critical for safety.
4. Add Weather Protection
Use a tarp or small roof outside.
5. Test the Flow
Make sure your dog can move easily between spaces.
Cost Estimate:
- $80–$200
Best For:
- Busy dog parents
- Dogs with frequent potty needs
- All-weather use
9. Gravel Dog Run (Low Maintenance & Clean)
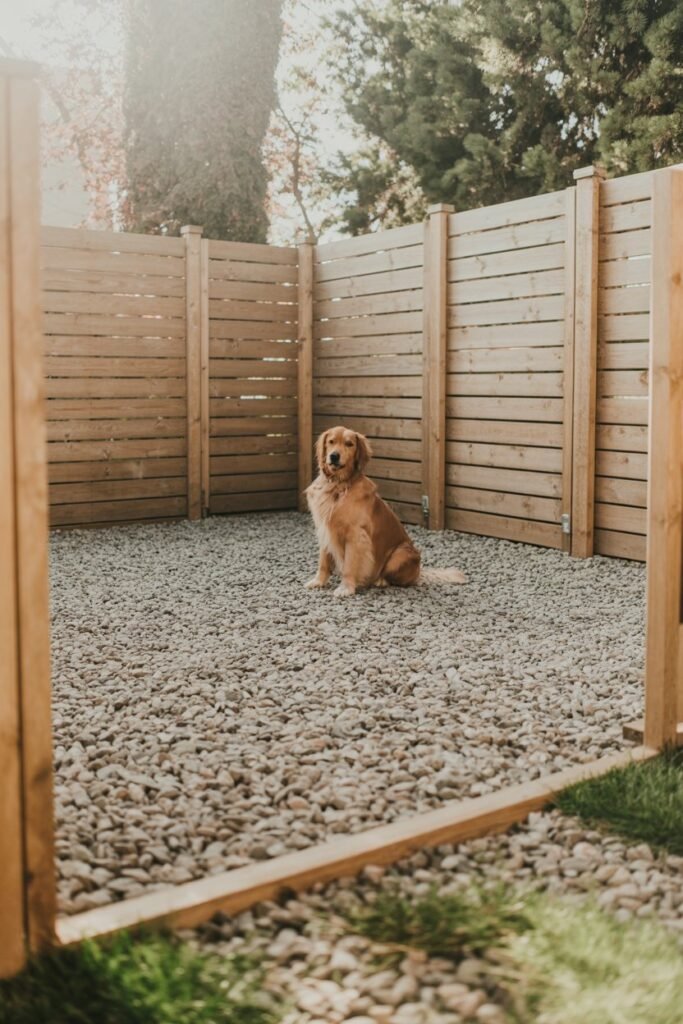
This is one of the most practical ground solutions and once installed, it makes life so much easier.
Why Gravel Works:
- Excellent drainage
- Reduces odor buildup
- Easy to hose down
What You’ll Need:
- Gravel (pea gravel is best)
- Landscape fabric
- Shovel
- Rake
Step-by-Step Instructions:
1. Clear the Area
Remove grass, roots, and debris.
2. Level the Ground
Flatten everything evenly.
3. Lay Landscape Fabric
This prevents weeds and keeps gravel in place.
4. Add Gravel Layer
Spread 2–3 inches evenly.
5. Rake Smooth
Ensure no uneven spots.
6. Test Drainage
Pour water to check flow.
Cost Estimate:
- $30–$100
Best For:
- Muddy yards
- Rainy areas
- Easy cleaning
10. Artificial Turf Dog Run (Clean, Soft & Stylish)
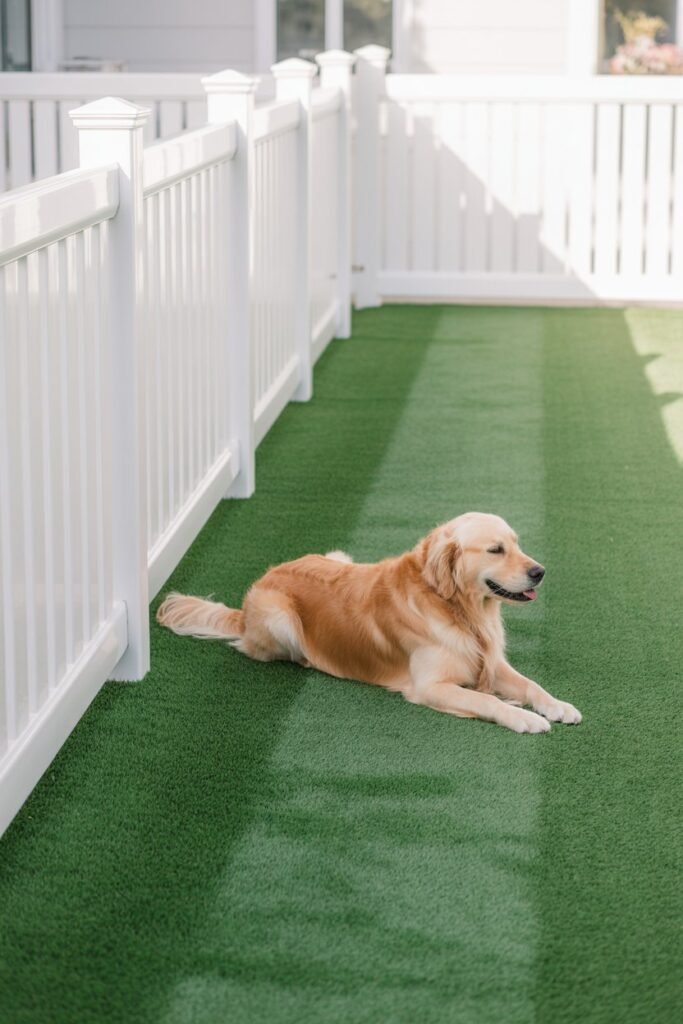
If you want something that looks polished and feels comfortable, this is a beautiful option.
Why You’ll Love It:
- Always looks green
- Soft on paws
- Low maintenance
What You’ll Need:
- Artificial turf roll
- Sand or gravel base
- Utility knife
- Stakes or adhesive
Step-by-Step Instructions:
1. Prepare the Ground
Clear and level thoroughly.
2. Add Base Layer
Use sand or fine gravel for stability.
3. Compact the Base
Press it down firmly.
4. Roll Out Turf
Position carefully before cutting.
5. Trim Edges
Fit perfectly to your space.
6. Secure in Place
Use stakes or adhesive.
7. Brush the Surface
Fluff fibers for a natural look.
Cost Estimate:
- $50–$150
Best For:
- Clean aesthetics
- Small runs
- Dogs that dislike gravel
11. Upcycled Dog Run (Creative & Budget Genius)
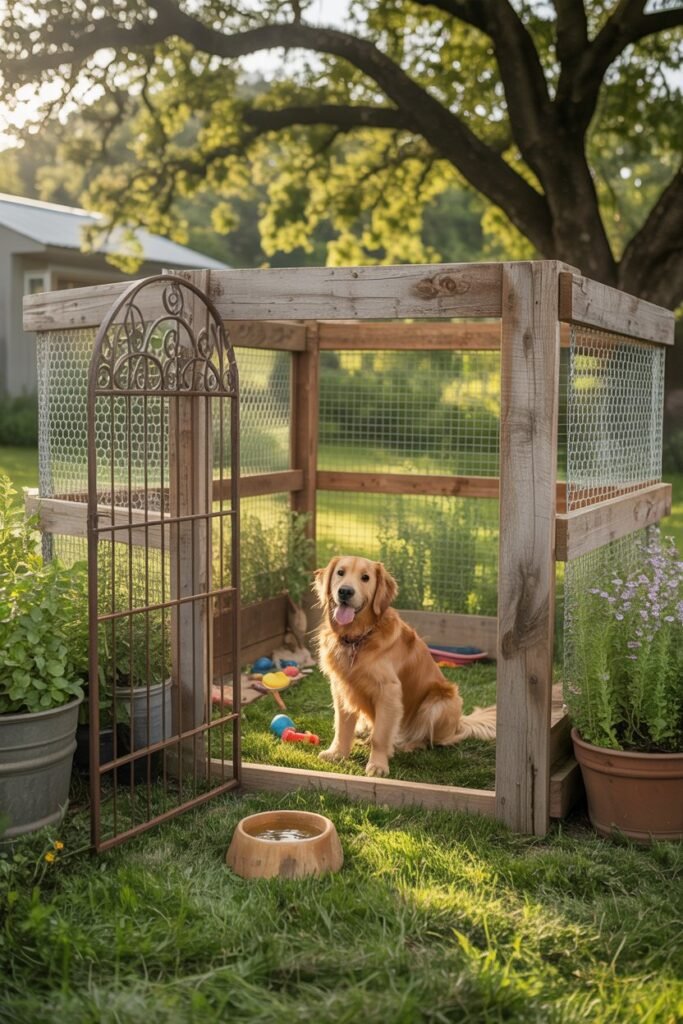
This is where creativity shines and honestly, some of the most charming dog runs come from this approach.
Why This Is Special:
- Extremely low cost
- Eco-friendly
- Completely customizable
What You’ll Need:
- Old gates, wood, or fencing
- Nails or screws
- Tools for cutting and shaping
Step-by-Step Instructions:
1. Gather Materials
Look for sturdy, reusable items.
2. Plan Your Layout
Work with what you have.
3. Build the Frame
Start with the strongest pieces.
4. Fill Gaps
Use mesh or smaller wood pieces.
5. Reinforce Everything
Check for weak points.
6. Sand Rough Areas
Protect your dog from injury.
7. Secure to Ground
Anchor where needed.
Cost Estimate:
- $0–$50
Best For:
- DIY lovers
- Creative builds
- Tight budgets
12. Portable Dog Run (Flexible & Travel-Friendly)
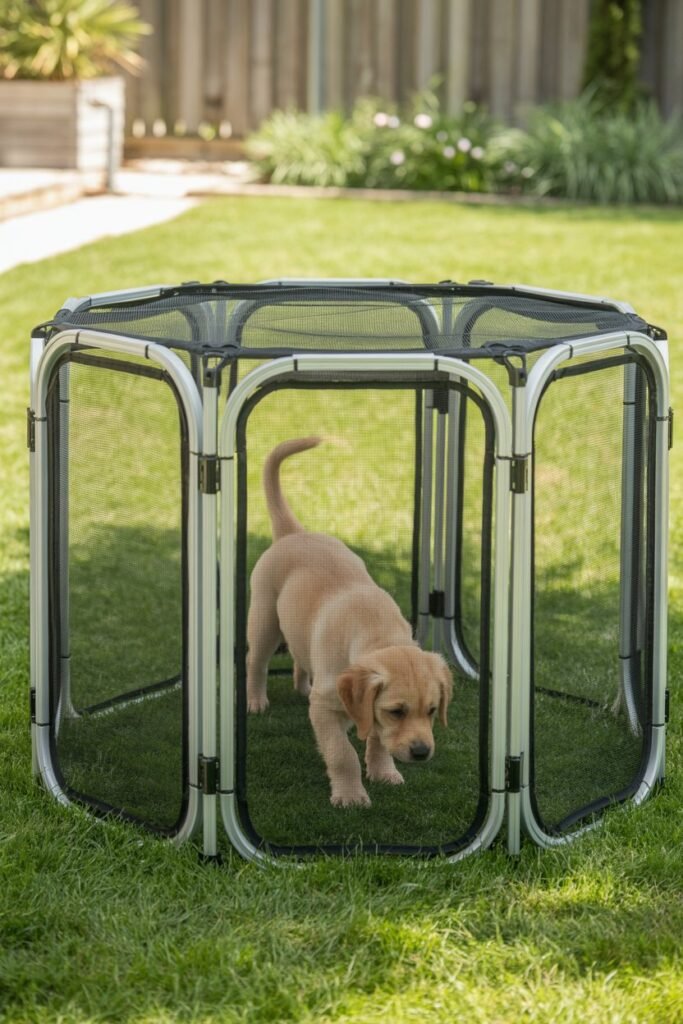
If you love flexibility, this option gives you freedom without commitment.
Why It’s So Useful:
- Easy to move
- Great for renters
- Perfect for trips or temporary setups
What You’ll Need:
- Lightweight panels or PVC
- Connectors or clips
- Optional carrying bag
Step-by-Step Instructions:
1. Choose Your Material
Panels are easiest; PVC is customizable.
2. Assemble Sections
Connect panels into your desired shape.
3. Secure Lightly
Use clips or ties avoid permanent fixes.
4. Test Stability
Make sure it won’t tip or collapse.
5. Disassemble When Needed
Store flat for easy transport.
Cost Estimate:
- $40–$120
Best For:
- Renters
- Travelers
- Temporary outdoor setups
Safety Tips Every Dog Mom Should Know
This part matters more than anything you build.
Always:
- Check for sharp edges
- Ensure proper height
- Provide constant access to water
- Add shade or shelter
- Test for escape points
Never:
- Use toxic materials
- Leave your dog in extreme heat
- Skip anchoring your structure
Budget Breakdown (What You Can Expect to Spend)
- Ultra cheap builds → $0–$50
- Mid-range DIY → $50–$150
- Durable long-term → $150–$300
Final Thoughts
A dog run doesn’t need to be perfect it just needs to be safe, thoughtful, and built with love.
When you take the time to create a space just for your dog, you’re giving them more than a place to stay. You’re giving them freedom, security, and a little corner of the world that feels like theirs.
And honestly? That’s one of the most beautiful things you can do as a dog parent.